Are you tired of worrying every time you leave your bike unattended? Making your own bike lock might sound tricky, but it’s easier than you think—and it can save you money while giving you peace of mind.
Imagine having a lock that fits your bike perfectly and keeps it safe from thieves. You’ll discover simple steps to create a reliable bike lock using materials you can find easily. Ready to protect your ride and feel confident wherever you go?
Let’s dive in and get started!

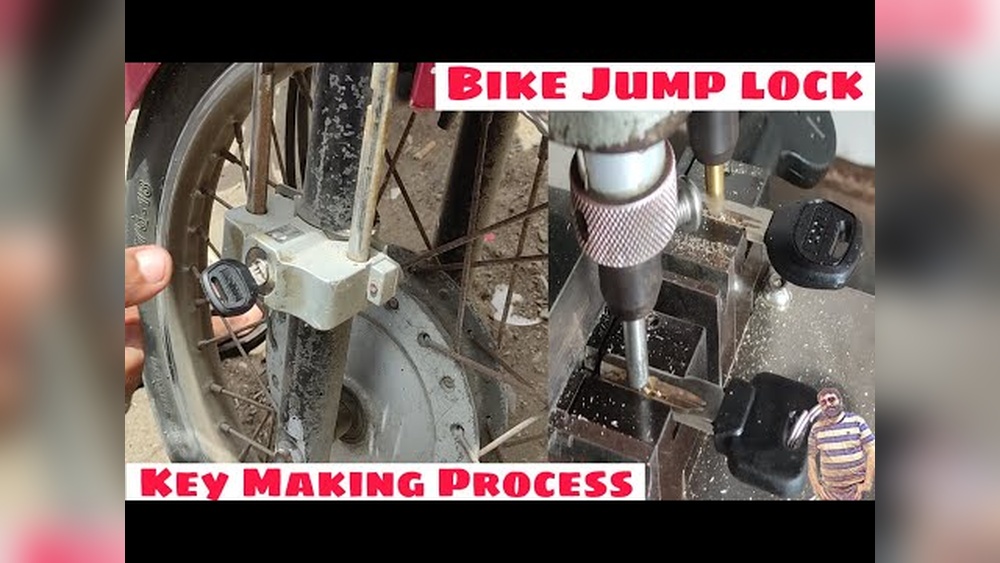
Credit: www.youtube.com
Choosing Materials
Choosing the right materials is key to making a strong and durable bike lock. The materials must resist cutting and breaking. Each part of the lock needs careful thought. The metal should be tough but workable. The lock components must fit well and work smoothly.
Gathering the right tools is also important. Proper tools help shape and assemble the parts correctly. Below are the main points to consider when selecting materials for your bike lock.
Selecting The Right Metal
Steel is the most common metal for bike locks. It is strong and hard to cut. Hardened steel offers extra protection. Avoid soft metals like aluminum. They can break or bend easily. Choose a metal that balances strength and weight. Thick steel chains or solid steel bars work best.
Gathering Lock Components
You need a locking mechanism that fits your metal parts. Look for cylinder locks or padlocks made for security. The lock must be easy to open but hard to pick. Collect washers, screws, and pins to hold the parts together. Every component should be sturdy and reliable.
Tools You’ll Need
Metal cutters and files help shape the metal pieces. A drill is needed to make holes for screws or pins. Screwdrivers and pliers assist in assembling parts tightly. A welding tool can join metal parts securely. Safety gear like gloves and goggles protects you during work.
Designing Your Lock
Designing your bike lock is a key step in making a secure and reliable device. This process shapes how well your lock will protect your bike. Thoughtful design means fewer chances for thieves to break it. It also affects how easy it is for you to use and carry.
Start by understanding different lock types. Then, create a clear plan on paper. Add safety features that increase strength and durability. Careful design helps build a lock that fits your needs perfectly.
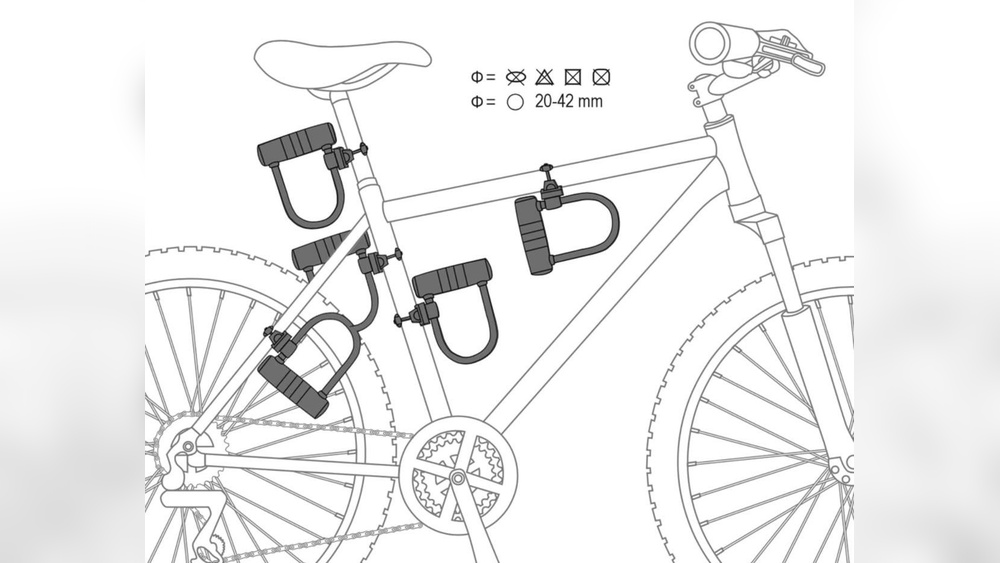
Types Of Bike Locks
Bike locks come in many forms. The most common types are U-locks, chain locks, cable locks, and folding locks. U-locks are strong and hard to cut. Chain locks offer flexibility but need thick chains for safety. Cable locks are lightweight but less secure. Folding locks combine compact size with moderate strength. Choose a type based on how and where you park your bike.
Sketching Your Lock Blueprint
Start sketching your lock design on paper. Draw the main shape and size. Mark where the locking mechanism will go. Keep the design simple for easy use. Note the materials you will use. Sketch any moving parts clearly. This blueprint guides you in building the lock step-by-step. It also helps spot weak points before construction.
Safety Features To Include
Add features that improve security. Use hardened steel or strong alloys for the body. Protect the locking mechanism with covers or shields. Include anti-pick pins inside the lock. Design the lock to resist cutting and twisting. Consider weatherproof seals to stop rust. These safety details make your lock tougher and longer-lasting.
Building The Lock Body
Building the lock body is a key step in making a strong bike lock. This part holds all pieces together. It must be tough and well-made. The lock body protects the locking mechanism inside. It also keeps the lock safe from damage or theft attempts.
The process involves working with metal parts. Cutting, shaping, and joining these parts create the solid frame of the lock. Each step needs care to ensure the lock works well and lasts long.
Cutting And Shaping Metal Parts
Start by selecting strong metal sheets or bars. Cut them into the needed sizes using metal cutters or saws. The pieces must fit tightly to avoid gaps.
Shape the metal with files or grinders. Smooth edges prevent damage to the bike or lock. Curves and bends give the lock a compact form. Accuracy here is important for a perfect fit.
Assembling The Frame
Arrange the cut and shaped parts to form the lock frame. The frame holds the locking core and shackle. Check all parts line up correctly before joining them.
Use clamps to keep pieces steady. Test how parts move and fit. This step ensures the lock opens and closes smoothly without sticking.
Welding And Securing Joints
Weld the metal parts together for a strong bond. Welding fuses the metal, making the lock hard to break. Use proper safety gear during welding.
After welding, clean the joints to remove slag. Inspect the welds for cracks or weak spots. Strong joints improve the lock’s durability and safety.

Credit: www.youtube.com
Creating The Locking Mechanism
Creating the locking mechanism is a key step in making a bike lock. This part controls how the lock opens and closes. A well-made mechanism keeps the bike safe and secure.
This section explains the main tasks. You will learn about installing the cylinder, setting up the key system, and testing the lock. Each step is important to build a strong lock.
Installing The Cylinder
The cylinder is the heart of the lock. It holds the pins that stop the lock from turning without the right key. Start by placing the cylinder inside the lock body. Make sure it fits tightly to avoid movement.
Use screws or clips to fix the cylinder in place. Check the alignment so the key can slide in smoothly. A well-installed cylinder makes the lock work better and last longer.
Setting Up The Key System
The key system controls how the lock opens. Each key has a unique pattern that matches the pins in the cylinder. Cut the key blanks carefully to fit the pins inside.
Insert the pins inside the cylinder according to the key design. Test the key by inserting it and turning gently. Adjust the pins if the key feels stuck or does not turn easily.
Testing The Lock Functionality
Testing the lock is important to ensure safety. Insert the key and turn it several times. The lock should open and close without trouble. Check for any sticking or jamming.
Try using the wrong key to see if the lock stays closed. If it opens, fix the pins or cylinder placement. Proper testing keeps the bike safe from theft.
Adding Protective Elements
Adding protective elements to a bike lock improves its strength and durability. These elements help the lock resist damage from weather and wear. They keep the lock working well for a long time.
Applying Rust-resistant Coating
Rust can weaken a bike lock quickly. Applying a rust-resistant coating protects the metal parts. This coating stops moisture from causing rust. It keeps the lock strong and safe.
Adding A Protective Sleeve
A protective sleeve covers the lock’s body and chain. It stops scratches and dents on the lock. The sleeve also prevents the lock from scratching the bike. Soft materials like rubber or plastic work best.
Incorporating Weatherproof Features
Weatherproof features protect the lock from rain and snow. Seals around the keyhole keep water out. A weatherproof lock lasts longer in all climates. These features reduce the chance of the lock freezing or jamming.

Credit: www.instructables.com
Final Assembly And Testing
The final assembly and testing stage is key to making a reliable bike lock. Here, all parts come together to form the complete lock. Careful checks ensure the lock works well and lasts long. This step guarantees your bike stays safe and the lock is easy to use every day.
Putting All Parts Together
Start by fitting the locking mechanism inside the lock body. Align the shackle with the slots on each side. Secure the parts using screws or rivets. Make sure the key or combination dial fits tightly. Every piece must fit without forcing. A loose or tight fit can cause problems later.
Checking For Durability
Test the lock by applying pressure to the shackle. Try to twist and pull it gently. The lock should hold firm without bending or breaking. Inspect all joints and screws for tightness. Look for cracks or weak spots in the metal. A strong lock will resist force and last for years.
Ensuring Easy Operation
Turn the key or spin the dial several times. The lock should open and close smoothly. Check for any sticking or jamming inside the mechanism. Lubricate moving parts if needed. The lock must open quickly without struggle. Easy use encourages regular locking and better bike safety.
Tips For Using Your Diy Bike Lock
Using a DIY bike lock needs care and attention to keep your bike safe. Simple steps can make your lock more effective. Learning how to use and care for your lock helps avoid problems. This section shares easy tips for using your homemade bike lock.
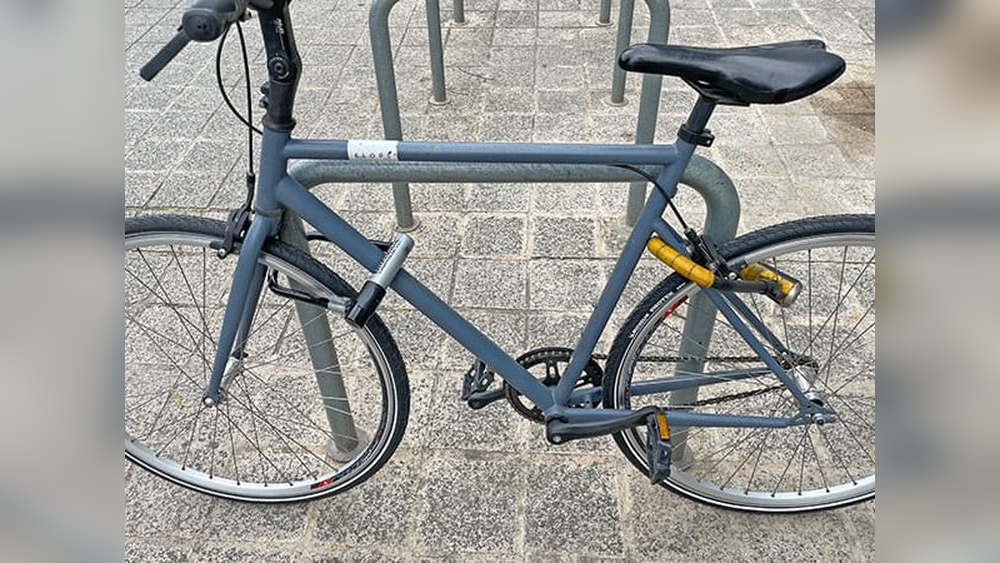
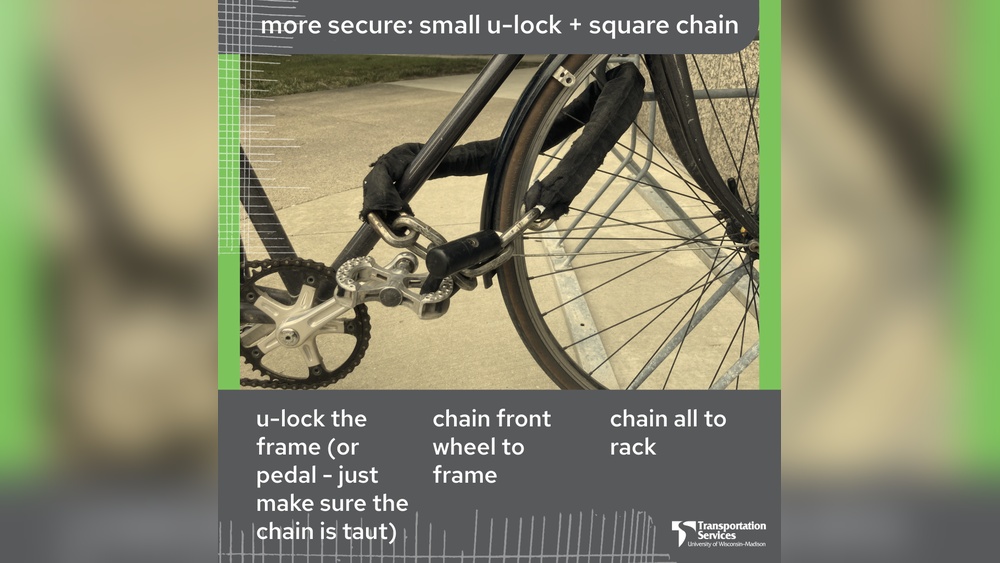
Best Practices For Locking Your Bike
Choose a solid, fixed object to secure your bike. Lock both the frame and the wheel together. Avoid locking your bike in isolated or poorly lit places. Check that your lock is tight and cannot be moved easily. Use more than one lock if possible for extra security.
Maintaining Your Lock
Keep your lock clean and dry to stop rust. Use oil or lubricant on the keyhole often. Check for any signs of wear or damage. Tighten any loose parts on your lock. Store your lock indoors when not in use to protect it from weather.
When To Upgrade Or Replace
Replace your lock if it has cracks or bends. Upgrade if your lock feels weak or easy to pick. Choose a stronger design if your area has many bike thefts. Change your lock after losing the key or code. Keep your bike safe with a reliable lock.
Frequently Asked Questions
How Do You Make A Simple Bike Lock At Home?
To make a simple bike lock, use a strong chain and a sturdy padlock. Wrap the chain around the bike frame and a fixed object. Secure the padlock through the chain links to prevent theft effectively.
What Materials Are Needed To Make A Bike Lock?
You need a heavy-duty chain, a durable padlock, and protective sleeves. The chain provides strength, the padlock secures it, and sleeves protect the bike frame from scratches.
Can I Use Everyday Items To Create A Bike Lock?
Yes, you can use a strong chain or cable and a reliable padlock. Ensure the materials are tough enough to resist cutting or tampering for better security.
How Secure Is A Homemade Bike Lock Compared To Commercial Ones?
A homemade bike lock can offer basic security but may lack advanced features. Commercial locks often use hardened materials and complex mechanisms, providing stronger theft protection.
Conclusion
Making a bike lock is a useful skill anyone can learn. It helps protect your bike from theft. Using simple tools and materials, you can build a strong lock. Always choose sturdy parts for better safety. Remember to test your lock before use.
This way, you ensure it works well. Creating your own lock saves money and adds personal satisfaction. Keep your bike safe and enjoy your rides worry-free. Try making one today and see how easy it can be!