Have you ever taken your glove box out and then struggled to put it back in? It can feel tricky and frustrating, especially when you’re not sure which part goes where.
But don’t worry—putting your glove box back in place is easier than you think. In this guide, you’ll get simple, step-by-step instructions that anyone can follow. By the end, you’ll feel confident fixing it yourself, saving time and avoiding extra trips to the mechanic.
Ready to get your glove box back where it belongs? Let’s dive in!
Credit: www.clublexus.com
Tools Needed
Getting the glove box back in place needs the right tools. Using proper tools saves time and prevents damage. Having everything ready makes the job smooth and easy.
Phillips Head Screwdriver
This tool helps remove and tighten screws holding the glove box. Most glove boxes use Phillips screws. A medium-sized screwdriver works best for most cars.
Flathead Screwdriver
A flathead screwdriver assists in prying off clips or panels gently. It is useful for loosening any stuck parts. Be careful to avoid scratching surfaces.
Flashlight
Good lighting helps see small parts inside the glove box area. A flashlight brightens tight spaces and corners. This makes reinstallation faster and safer.
Socket Wrench Set
Some glove boxes use bolts instead of screws. A socket wrench fits these bolts perfectly. Having a set with various sizes is helpful for different cars.
Plastic Trim Removal Tool
This tool removes plastic trims without causing damage. It is gentle on delicate parts around the glove box. A plastic tool prevents scratches and cracks.
Credit: priuschat.com
Prepare The Glove Box
Preparing the glove box before putting it back is essential. It helps the glove box fit well and work smoothly. Taking time to check and clean the parts avoids problems later.
This step makes sure the glove box opens and closes without trouble. It also keeps your car interior neat and safe.
Remove Debris And Check Components
Start by clearing out any dirt or debris inside the glove box. Use a soft cloth or vacuum to clean all corners. Dust and small objects can stop the glove box from closing properly.
Look at the components inside. Check for broken or missing parts like screws or clips. Replace or fix damaged pieces to keep the glove box stable.
Inspect Hinges And Latch
Check the hinges carefully. They should move smoothly without noise or resistance. Lubricate them with a small amount of oil if needed.
Examine the latch mechanism next. It must lock and unlock easily. If it feels stuck or loose, adjust or clean it for better function.
Align The Glove Box
Aligning the glove box is an important step in putting it back properly. This step ensures smooth opening and closing. A well-aligned glove box fits perfectly and stays secure during drives.
Focus on positioning and hinge placement to avoid issues later. Taking time here saves effort on fixing problems after assembly.
Positioning The Box Correctly
Start by holding the glove box near its opening. Check that it sits evenly with the dashboard edges. The box should not tilt or stick out.
Look for guide pins or slots on both the glove box and dashboard. These help place the box in the right spot. Gently move the box until these parts line up perfectly.
Make sure the glove box door can open fully without hitting anything. Adjust slightly if needed. Good positioning means smooth use and no damage over time.
Securing The Hinges
Once aligned, focus on the hinges that attach the glove box. Hinges keep the box stable and allow it to open and close easily.
Insert the hinge pins or screws carefully. Tighten them just enough to hold the box firmly. Avoid overtightening which can cause damage or misalignment.
Test the glove box door by opening and closing it several times. The movement should feel smooth and steady. Fix any wobble by adjusting the hinges slightly.
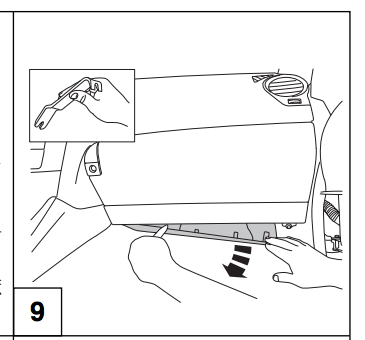
Reattach The Glove Box
Reattaching the glove box is an important step in restoring your car’s interior. This process helps the glove box function properly and stay secure. Follow these simple steps to put the glove box back in place.
Connecting The Latch Mechanism
Start by aligning the latch mechanism with its slot on the glove box frame. Gently push the latch into place until you hear a click. This ensures the glove box will open and close smoothly. Check that the latch moves freely without sticking.
Tightening Screws And Bolts
Next, secure the glove box by tightening all screws and bolts. Use a screwdriver or wrench that fits each fastener. Tighten them evenly to avoid damaging the glove box. Make sure everything feels firm but do not overtighten.
Test The Glove Box
Testing the glove box is a key step after reinstalling it. This check ensures the glove box works correctly. It helps avoid damage or inconvenience later.
Opening And Closing Smoothly
Open the glove box gently. Notice if it moves without sticking or jamming. Close it with light pressure. It should shut securely without force. Smooth movement shows proper alignment and fitting.
Adjusting If Needed
If the glove box feels tight or loose, adjust it. Loosen screws slightly to realign the box. Tighten screws once movement feels right. Check the latch to make sure it locks well. Repeat opening and closing tests after adjustments.
Common Issues And Fixes
Putting the glove box back in place can sometimes be tricky. Common problems may stop it from closing or fitting well. Knowing these issues helps fix them quickly. Below are common problems and simple fixes.
Glove Box Won’t Close
The glove box might not close if something blocks it. Check for any objects inside the box. Remove anything stuck or too big. Dirt or debris can also stop it from closing. Clean the edges and latch area carefully. Sometimes, the latch itself is broken. Test the latch by pressing it gently. If broken, replace the latch with a new one. This simple step often solves the closing problem.
Loose Or Broken Hinges
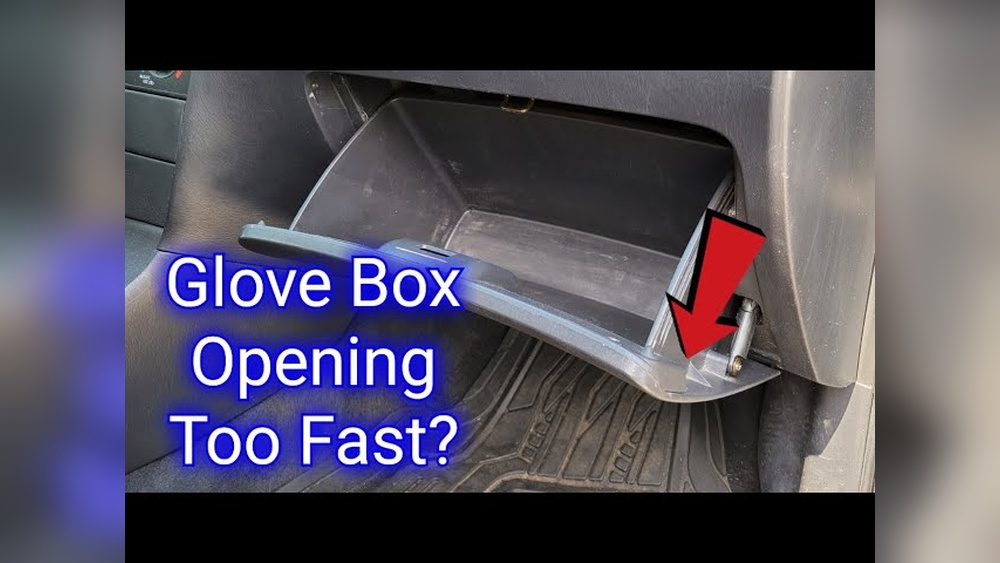
Hinges hold the glove box in place. Loose hinges make the box wobble or fall out. Tighten screws that hold the hinges. Use a screwdriver to secure them firmly. Broken hinges need replacement. Buy the correct hinges for your car model. Remove the old hinges carefully. Attach new hinges in the same spot. Ensure they fit tightly before closing the box. Proper hinges keep the glove box stable and working well.

Credit: www.reddit.com
Frequently Asked Questions
How Do I Reattach A Glove Box Door Properly?
To reattach the glove box door, align the hinges with their slots. Gently push the door until it clicks into place. Ensure the latch mechanism is engaged for secure closing.
What Tools Are Needed To Reinstall A Glove Box?
Typically, you need a screwdriver and sometimes pliers. Check for screws or clips holding the glove box. Having a flashlight helps to see inside the dashboard area.
How Can I Fix A Glove Box That Won’t Close?
Inspect for debris or misaligned hinges blocking closure. Adjust the latch or hinges if needed. Lubricate moving parts with silicone spray to ensure smooth operation.
Is It Necessary To Remove The Glove Box Completely?
Removing the glove box helps to access certain components easily. However, minor repairs or reattachment may only require partial removal. Follow your vehicle’s manual for specific instructions.
Conclusion
Putting the glove box back is simple with the right steps. Take your time and follow each instruction carefully. Make sure all parts fit snugly and securely. Check the latch to confirm it opens and closes smoothly. A well-installed glove box keeps your car organized and safe.
This small task can save you time and effort later. Keep your tools handy for any future adjustments. Practice makes perfect, so don’t rush the process. You can do this easily and confidently.