Have you ever wondered if the glove box interior in your car can be removed? Whether you want to clean it thoroughly, fix a broken part, or customize your vehicle, knowing how to take out the glove box interior is key.
You might think it’s complicated, but it’s easier than you expect. You’ll discover simple steps and expert tips that make the process smooth and hassle-free. Keep reading to unlock the secrets of your glove box and take control of your car’s interior like a pro.

Credit: www.reddit.com
Reasons To Remove Glove Box Interior
Removing the glove box interior is not just about taking out a part. It serves many practical purposes. Knowing why to remove it helps in maintaining or upgrading your vehicle. This section explores key reasons for this task.
Accessing Cabin Air Filter
The cabin air filter often hides behind the glove box interior. Removing the glove box allows easy access to this filter. Replacing the filter keeps the car’s air fresh and clean. Regular changes prevent dust and allergens inside the vehicle.
Fixing Glove Box Issues
Sometimes the glove box stops working properly. It might not close or open smoothly. Removing the interior helps to see and fix broken parts. Repairing the latch or hinges often requires this step. This keeps the glove box functional and safe.
Upgrading Interior Components
Car owners may want to upgrade the glove box area. Removing the interior allows installation of new parts or lights. Upgrades improve the look and utility of the glove box. It can also create more storage space or add custom features.
Tools Needed For Removal
Removing the glove box interior requires the right tools. Using proper tools makes the job easier and safer. Some tools are basic and found in most toolboxes. Others are specialized and made for car interiors.
Basic Hand Tools
Basic hand tools include screwdrivers, pliers, and a socket wrench. A Phillips screwdriver helps remove screws holding the glove box. Flathead screwdrivers can pry open clips or covers gently. Needle-nose pliers assist in pulling small fasteners or connectors. A socket wrench set fits bolts that secure the glove box frame. Having a flashlight aids visibility inside tight spaces. These tools cover most removal tasks for standard glove boxes.
Specialized Equipment
Specialized equipment may be needed for some vehicles. Trim removal tools help avoid damage to plastic panels. These tools are plastic and flexible, perfect for prying clips without scratches. A panel clip remover speeds up removing fasteners. Some cars require Torx drivers for star-shaped screws. Magnetic trays keep small screws safe during the process. Using specialized tools protects the glove box and car interior from damage.
Preparing For Removal
Removing the glove box interior needs some preparation. This helps avoid damage and makes the process easier.
Taking a few simple steps before removal saves time and effort. It also keeps your car parts safe.
Clearing The Glove Box
Empty the glove box completely. Take out all items, including papers and small objects.
Check every corner. Small items can hide and block screws or clips.
Removing everything gives clear access to screws and fasteners. It prevents losing anything inside the car.
Ensuring Safety Precautions
Turn off the car engine before starting. This stops any electrical problems or accidents.
Disconnect the car battery if you work near electrical parts. This avoids short circuits or shocks.
Wear gloves to protect your hands from sharp edges. Use eye protection if dust or debris appears.

Credit: www.pelicanparts.com
Step-by-step Removal Process
Removing the glove box interior is a simple task with the right steps. This process helps you access parts behind the glove box or clean inside better. Follow this clear guide to remove the glove box interior safely and quickly.
Opening And Emptying The Glove Box
First, open the glove box fully. Take out all items inside. Remove papers, tools, or small objects. Clearing the box makes it easier to work without damage.
Releasing Glove Box Stops
Next, find the stops that hold the glove box in place. Press or squeeze the sides to release these stops. This lets the glove box swing down more freely. Some models have small tabs to push. Take care not to break them.
Detaching The Interior Panel
Look at the back of the glove box interior. Find the panel that needs removal. Gently pull or pry it away from the main structure. Use a plastic tool to avoid scratches. The panel may snap off with mild pressure.
Removing Fasteners And Clips
Check for screws or clips holding the interior panel. Use a screwdriver or pliers to remove them. Keep all fasteners in a safe place. Removing these parts frees the interior for full removal.
Common Challenges And Fixes
Removing the glove box interior can be tricky. Many people face common problems during the process. Knowing these challenges helps to avoid damage. Simple fixes make the task easier and safer.
Stuck Or Broken Clips
Clips hold the glove box in place. They can get stuck or break easily. Use a flat tool to gently pry clips loose. Avoid using too much force to prevent damage. If clips break, replace them before reassembling. This keeps the glove box secure and stable.
Handling Delicate Components
Inside the glove box, small parts need careful handling. Wiring and sensors may be attached. Disconnect these parts slowly and carefully. Rough handling can cause electrical problems later. Keep track of all screws and parts removed. This helps during reassembly and prevents missing pieces.
Reinstalling The Glove Box Interior
Reinstalling the glove box interior is a simple task. It requires careful attention to avoid damage and ensure it fits well. Follow clear steps to put the glove box back in place securely.
Aligning Panels And Clips
Start by positioning the glove box interior close to its original place. Check that all clips line up with their slots. Gently push the panels together, making sure the clips fit snugly. Avoid forcing parts to prevent breakage.
Securing Fasteners
Use the screws or bolts removed earlier to fix the glove box in place. Tighten each fastener evenly and firmly. Do not over-tighten, as it can crack the plastic. Secure all fasteners to keep the glove box stable.
Testing For Proper Function
Open and close the glove box several times. Check for smooth movement and proper alignment. Make sure it latches securely and does not rattle. Confirm that everything works as it should before finishing.

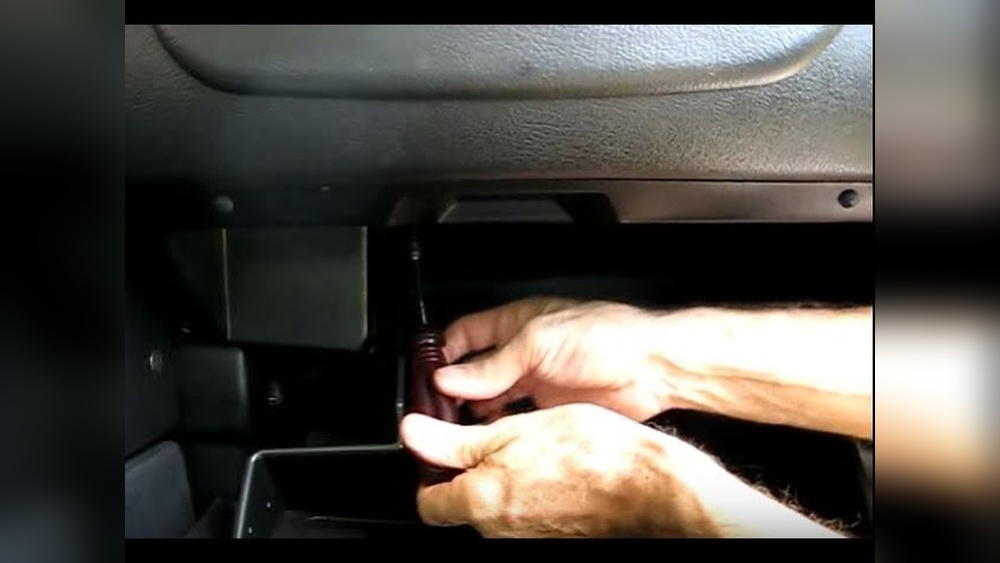
Credit: www.youtube.com
Frequently Asked Questions
Can The Glove Box Interior Be Removed Easily?
Yes, the glove box interior can usually be removed by unscrewing fasteners. This allows access for cleaning or repairs.
Why Remove The Glove Box Interior?
Removing it helps access components behind, such as the cabin air filter or wiring.
What Tools Are Needed To Remove The Glove Box Interior?
Common tools include a screwdriver and sometimes a trim removal tool to avoid damage.
Is It Safe To Remove The Glove Box Interior Myself?
Yes, if you follow instructions carefully. Be gentle to avoid breaking clips or panels.
Conclusion
Removing the glove box interior can be simple with the right tools. Most cars allow easy removal by unscrewing a few bolts. Doing this helps clean or repair the inside space. Always check your car manual for exact steps. Take your time to avoid damage.
Small tasks like this save money and keep your car tidy. Now, you know that glove box interiors are not fixed permanently. Try it yourself and see how easy it can be.