If you want to improve your mountain bike’s handling and comfort, adding spacers to your stem lock washer is a simple, effective step you can take. But how do you do it right?
You might be wondering if it’s tricky or if you need special tools. Don’t worry—this guide breaks down the process into easy steps anyone can follow. By the end, you’ll know exactly how to adjust your stem with spacers to get the perfect fit and ride experience.
Keep reading to find out how to make your mountain bike work better for you.
Tools Needed
Before adding spacers to your mountain bike stem lock washer, gather the right tools. Using proper tools makes the job easier and safer. It helps avoid damage to your bike parts. Here is a list of tools you will need.
Allen Wrenches
Allen wrenches, also called hex keys, are essential. They fit the bolts on your bike stem. Usually, a 4mm or 5mm size works best. Have a set of different sizes just in case.
Torque Wrench
A torque wrench ensures you tighten bolts to the correct force. Too much force can damage parts. Too little force can make parts loose. Set it to the bike maker’s recommended torque.
Spacers
Spacers are small rings that adjust stem height. Use the correct size for your stem and fork. They come in different thicknesses. Choose the right number of spacers for a comfortable ride.
Grease
Grease helps parts fit smoothly and prevents rust. Apply a thin layer on the fork’s steerer tube before adding spacers. This makes installation easier and protects the metal.
Clean Cloth
A clean cloth wipes dirt and old grease off parts. Clean surfaces help spacers and washers fit well. Keep the cloth handy for quick cleaning during the process.
Credit: www.alibaba.com
Check Stem And Washer Compatibility
Checking the compatibility between the stem and the lock washer is essential before adding spacers. This step ensures a secure fit and safe ride. Using parts that do not match can cause damage or poor performance. Always verify the dimensions and type of both components.
Stem and lock washers come in different sizes and designs. Some stems use a flat washer, while others require a beveled or split washer. Matching the washer type to the stem style is crucial to maintain proper clamping force.
Measure Stem Diameter And Thickness
Start by measuring the diameter of the stem’s fork tube clamp. Use a caliper for accuracy. Then, check the thickness of the existing lock washer. These measurements help find spacers that fit well.
Identify Washer Type And Shape
Look closely at the lock washer’s shape. Is it flat, curved, or split? Different shapes serve various purposes and fit specific stems. Choose spacers that complement the washer’s design.
Match Spacer Material And Size
Select spacers made from compatible materials like aluminum or steel. Check spacer thickness and outer diameter. Proper matching prevents slipping and damage during riding.
Remove Existing Components
Removing the existing components from your mountain bike stem is the first step. This process prepares the bike for adding spacers to the stem lock washer. Proper removal ensures safety and smooth assembly later.
Take your time and be careful. Rushing can cause damage to the bike parts or injury.
Gather Necessary Tools
Start by collecting all tools needed. You will need an Allen wrench or hex key set. A clean workspace helps keep parts organized.
Loosen The Stem Bolt
Use the correct size Allen wrench to loosen the stem bolt. Turn it counterclockwise until it is fully loose. Do not remove it completely yet.
Remove The Handlebar
Carefully slide the handlebar off the stem. Support the handlebar to avoid bending cables. Set it aside safely to prevent damage.
Take Off The Lock Washer
Remove the lock washer by lifting it straight off the stem. This washer keeps the stem tight on the fork. Inspect it for wear or damage.
Remove Existing Spacers
Slide off any spacers located above or below the lock washer. Keep them safe if you plan to reuse. Note their order for reference during reassembly.
Select The Right Spacer Size
Selecting the right spacer size for your mountain bike stem lock washer is important. The spacer affects the height and fit of your handlebars. Choose a size that keeps your bike comfortable and safe to ride.
Spacers come in different thicknesses. Common sizes range from 2mm to 10mm. A thicker spacer raises the stem higher, while a thinner one lowers it. Pick the size that matches your riding style and comfort needs.
Too thick or too thin spacers can cause issues. They might make the handlebars unstable or hard to control. Always measure carefully before adding spacers to avoid problems.
Select Spacer Size Based On Handlebar Height
Think about how high you want your handlebars. A higher handlebar gives a relaxed posture. A lower handlebar allows better control on rough trails. Match the spacer thickness to your preferred height.
Measure The Space Between Stem And Headset
Remove the stem cap and check the gap above the headset. This space shows how much room you have for spacers. Use a ruler or caliper to measure it precisely. This helps pick the right spacer size.
Consider Your Riding Style
Cross-country riders often prefer thinner spacers for a lower position. Trail and downhill riders usually choose thicker spacers for comfort. Adjust spacer size based on the type of riding you do most.
Test Different Spacer Sizes
Try different spacers to find the best fit. Start with thinner spacers and add more if needed. Ride and feel the difference before deciding the final size. Small changes can improve your ride a lot.
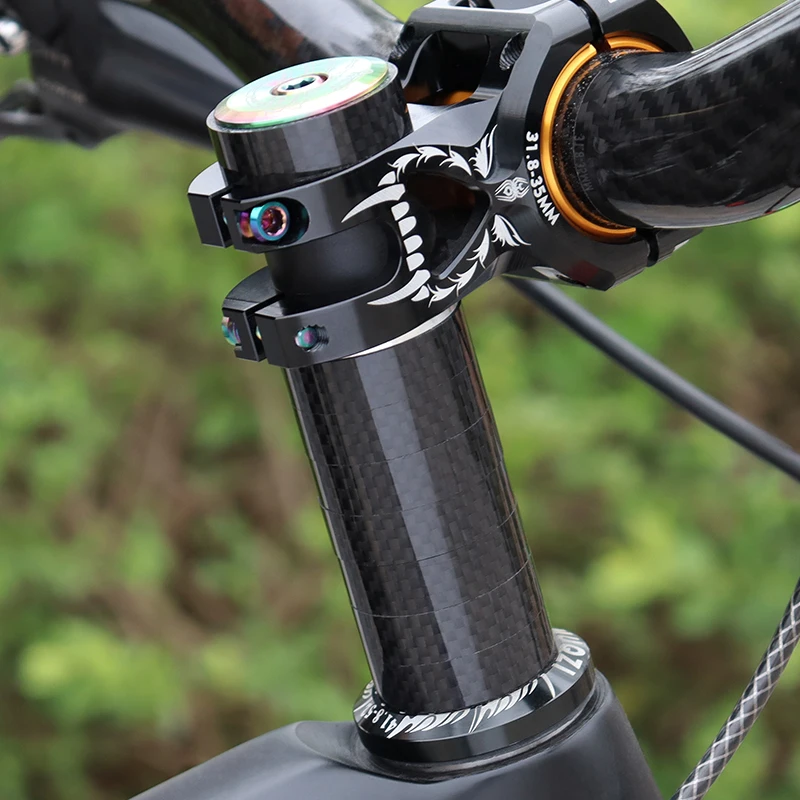
Position The Spacer On The Stem
Place the spacer carefully onto the bike stem, right above the lock washer. Make sure it sits flat and does not wobble. This helps keep the stem secure and stable during rides.
Understanding The Role Of The Spacer
Positioning the spacer on the stem is a key step for proper bike setup. The spacer helps adjust the handlebar height and fit. Without the spacer, the stem may not sit correctly. This can affect your ride comfort and control.
The spacer sits between the stem and the lock washer. It fills the gap and secures the stem firmly. Knowing where and how to place it ensures a safe and stable handlebar.
Preparing The Stem For Spacer Placement
Start by loosening the top cap bolt on the stem. Remove the top cap and the lock washer carefully. Keep the parts organized to avoid losing anything. Check the spacer size matches your setup needs. Clean the stem area to remove dirt or grease for better fit.
Placing The Spacer Correctly
Slide the spacer onto the steering tube right above the headset. The spacer should sit flush against the headset or other spacers below. Make sure it aligns evenly around the tube. Do not force or tilt the spacer, as this can cause damage. The spacer must be flat and stable before adding the stem back.
Reassembling The Stem And Lock Washer
Place the stem carefully over the spacer. The lock washer goes between the stem and the top cap. Tighten the top cap bolt lightly to keep parts in place. Check that the stem rotates smoothly without wobble. Adjust the bolt tension later for final secure fit.
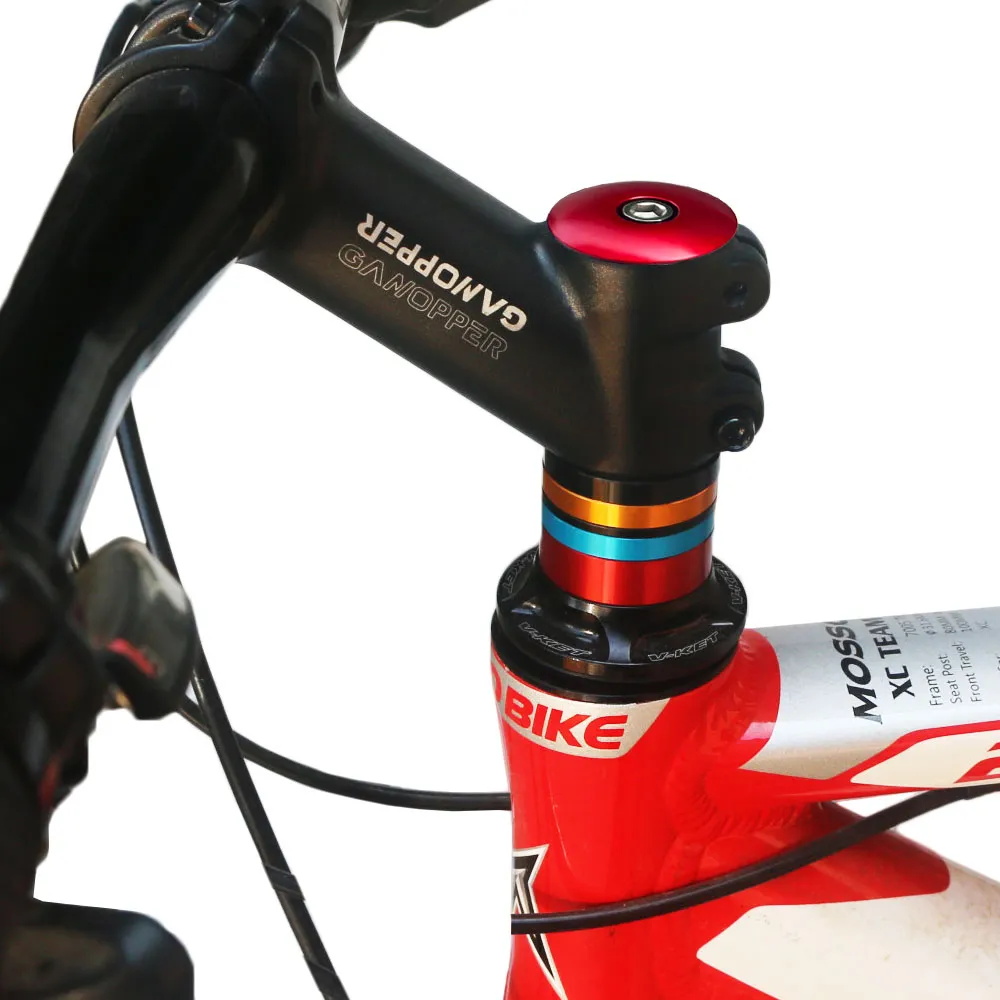
Credit: www.ravecommercial.com
Reinstall The Lock Washer
Reinstalling the lock washer on your mountain bike stem is a key step. It helps keep the stem and spacers tight and secure. Doing this right prevents wobble and ensures a safe ride.
Clean The Stem And Lock Washer
Start by cleaning the stem and lock washer. Dirt or grease can stop the washer from fitting well. Use a clean cloth to wipe both parts. This helps the lock washer sit flat and hold tight.
Place The Lock Washer Correctly
Put the lock washer back on the stem bolt. Make sure the teeth on the washer face the stem. The teeth help grip and stop the bolt from loosening. Align the washer so it fits snugly against the stem.
Tighten The Stem Bolt Slowly
Turn the stem bolt by hand first. This helps the lock washer settle in place. Use a wrench to tighten the bolt carefully. Tighten a little at a time. Check the stem for any movement as you tighten.
Check The Stem Alignment
Make sure the stem is straight with the front wheel. Adjust if needed before fully tightening. A straight stem improves control and comfort while riding. Hold the stem steady to avoid shifting.
Final Tightening And Safety Check
Finish tightening the bolt firmly but not too hard. Over-tightening can damage the lock washer or stem. Check the stem and spacers for any play. Give the handlebars a gentle twist to confirm tightness.
Tighten The Stem Bolt Correctly
Tightening the stem bolt correctly is key to a safe and smooth ride. It holds the stem and spacers firmly in place. Too loose, and the handlebars can move unexpectedly. Too tight, and you might damage the parts.
Knowing how to tighten the bolt right keeps your bike steady. It also protects the stem lock washer and spacers from wear or breakage. Follow simple steps to get the perfect tightness every time.
Tighten The Bolt Gradually And Evenly
Use a torque wrench to tighten the bolt slowly. Tighten a little bit on one side, then the other. This helps spread the pressure evenly. Avoid tightening one side more than the other.
Follow Manufacturer Torque Specifications
Check the stem or bike manual for the exact torque value. Use the recommended setting on your torque wrench. Do not guess or overtighten. Correct torque prevents damage and keeps parts secure.
Check The Stem Alignment Before Final Tightening
Make sure the stem is straight with the front wheel. Align the handlebars in the right direction. Hold the alignment steady while tightening the bolt. Misalignment can cause control problems while riding.
Test The Tightness After Tightening
After tightening, try to move the handlebars side to side. There should be no play or wobble. If you feel any movement, tighten the bolt a bit more. Ensure the stem lock washer and spacers are firmly held.

Credit: www.ebay.com
Test For Proper Fit And Alignment
Testing for proper fit and alignment is crucial after adding spacers to your mountain bike stem lock washer. This step ensures your bike handles correctly and stays safe during rides.
Improper fit can cause steering issues or damage parts. Alignment keeps the handlebar straight and stable. Follow these checks carefully to confirm everything sits just right.
Visual Inspection Of Spacer Placement
Start by looking closely at the spacer and lock washer area. The spacers should sit flat and flush against the stem and headset. No gaps or uneven spots should appear.
Check that the lock washer is properly seated and not tilted. A misaligned washer can cause looseness and affect steering precision.
Check Handlebar Alignment
Stand in front of the bike and look at the handlebar position. It must be perfectly straight and centered over the front wheel.
If the handlebar tilts left or right, adjust the spacers and stem until it aligns. A straight handlebar improves control and ride comfort.
Test For Tightness And Stability
After confirming alignment, tighten the stem bolts evenly. Avoid overtightening, which can damage parts.
Push and pull the handlebar to check for movement. No wobble or play should occur. Stability indicates a correct fit and safe setup.
Troubleshooting Common Issues
Adding spacers to a mountain bike stem lock washer can fix fit and alignment problems. Check the washer size and place spacers evenly for a secure fit. Tighten bolts carefully to avoid damage while ensuring proper stem height.
Spacer Does Not Fit Properly
Check the spacer size before installation. Spacers come in different thicknesses and diameters.
Use the exact size recommended for your stem and lock washer. A wrong spacer may cause poor fit.
Clean the area around the lock washer. Dirt or debris can block the spacer from fitting correctly.
Handlebar Feels Loose After Adding Spacer
Ensure the stem bolt is tightened correctly. Loose bolts cause handlebar wobble and instability.
Do not overtighten the bolt. Excess force can damage the lock washer or stem.
Check if the spacer is seated flat. An uneven spacer can create gaps and loosen the setup.
Difficulty Removing The Stem Bolt
Use the correct size Allen key or wrench for the bolt. Wrong tools can strip the bolt head.
Apply penetrating oil if the bolt is stuck. Let it sit for a few minutes before trying again.
Turn the bolt slowly. Quick force may break the bolt or damage threads.
Frequently Asked Questions
What Is The Purpose Of A Mountain Bike Stem Lock Washer?
A stem lock washer keeps the stem securely fastened to the bike’s fork. It prevents loosening during rides, ensuring safety. Adding spacers adjusts handlebar height without compromising the lock washer’s function.
How Do Spacers Affect Mountain Bike Stem Installation?
Spacers raise or lower the stem to customize handlebar height. They fit between the headset and stem. Proper spacer placement ensures a secure fit and maintains steering precision.
Can I Add Spacers Above The Stem Lock Washer?
No, spacers must be placed below the stem lock washer. This positioning maintains proper headset preload and prevents damage. Incorrect placement can cause loose steering and unsafe handling.
What Tools Are Needed To Add Spacers To The Stem Lock Washer?
You need an Allen wrench set to loosen stem bolts. A torque wrench helps tighten bolts to the correct specification. Optionally, a headset wrench may be required for adjustments.
Conclusion
Adding spacers to your mountain bike stem lock washer is simple. It helps adjust handlebar height for a better ride. Use the right tools and follow steps carefully. This small change can improve comfort and control on trails. Take your time and double-check each part fits well.
A properly spaced stem keeps your bike safe and steady. Try it yourself and enjoy smoother rides ahead.