Do you want to learn how to draw a boxing glove easily, even if you’ve never picked up a pencil before? You’re in the right place.
Drawing a boxing glove might seem tricky, but with the simple steps you’ll discover here, it becomes fun and straightforward. By following this guide, you’ll create a cool, realistic boxing glove that you can be proud of. Ready to impress yourself and others with your drawing skills?
Let’s get started and make your artistic journey smooth and enjoyable!

Credit: www.wikihow.com
Materials Needed
Gathering the right materials makes drawing a boxing glove easier and more fun. Simple tools help you focus on shapes and details. The right paper supports your drawing style and medium. Adding color can bring your glove to life with depth and style. Below are the essentials to start your drawing journey.
Basic Drawing Tools
Start with a pencil for sketching outlines. A sharp pencil gives clean, precise lines. Use an eraser to fix mistakes and lighten lines. A good sharpener keeps your pencil ready to use. A ruler helps with straight edges if needed.
Recommended Paper Types
Choose smooth drawing paper for pencil sketches. It holds graphite well and erases cleanly. Mixed media paper works if you plan to add color. Avoid thin paper that wrinkles or tears easily.
Optional Coloring Supplies
Colored pencils add soft, blendable color to your drawing. Markers give bright, bold colors and sharp edges. Watercolors offer a smooth, natural look with gentle tones. Use a fine-tip pen to outline and define shapes clearly.
Basic Shapes
Drawing a boxing glove starts with breaking down its shape into basic forms. These simple shapes help create a solid foundation. The glove’s roundness and curves can be captured using circles and ovals. This approach makes drawing easier and less intimidating.
Using basic shapes guides your hand and improves accuracy. It also helps maintain the glove’s proportions. You can adjust the shapes as you go to match the glove’s unique look.
Starting With Simple Forms
Begin with a large oval for the main part of the glove. This represents the padded knuckle area. Add a smaller circle or oval near the bottom for the wrist cuff. Use a curved line to connect these shapes smoothly. This forms the basic glove structure.
Keep your lines light so you can erase and adjust later. Focus on the overall shape, not details yet. These simple forms act like building blocks for your drawing.
Sketching The Glove Outline
Use the basic shapes to sketch the glove’s outline. Draw a curved line around the oval to show the glove’s bulk. Shape the thumb area by adding a small rounded form on the side. Make sure the wrist cuff looks wide and padded.
Follow the flow of the glove’s natural curves. Don’t worry about perfect lines now. The outline will help guide the final details and shading in later steps.
Drawing The Glove Details
Practice is key to drawing a boxing glove easily and confidently. Exercises help improve your observation and drawing skills. Regular practice builds muscle memory and sharpens your eye for details. Try different exercises to keep your practice fun and effective.
Drawing Different Angles
Start by sketching boxing gloves from various angles. Draw the glove facing forward, sideways, and at a slight tilt. This trains your brain to see shapes in three dimensions. Use simple shapes like circles and ovals to map out the form. Practice shading to show depth and curves. Drawing many angles helps you understand the glove’s structure better.
Experimenting With Styles
Try different drawing styles to find what suits you best. Draw the glove with bold lines for a cartoon look. Use soft shading for a realistic effect. Experiment with sketchy lines for a loose, dynamic feel. Change the size and proportions to create unique gloves. Playing with styles keeps your practice creative and enjoyable. It also improves your flexibility as an artist.

Credit: www.youtube.com
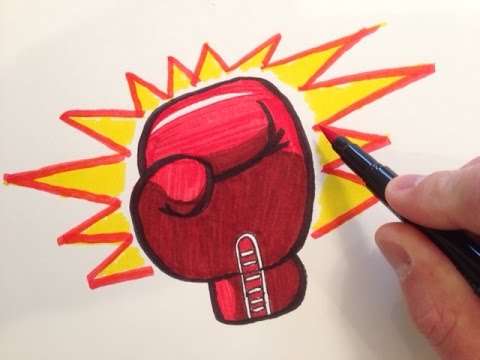
Credit: www.youtube.com
Frequently Asked Questions
How To Draw A Simple Boxing Glove?
Start by drawing a rounded rectangle for the glove’s main shape. Add a curved line for the thumb. Sketch finger lines and outline the wrist strap. Shade lightly for depth. Keep shapes simple and smooth for an easy boxing glove drawing.
What Gloves Did Mike Tyson Wear?
Mike Tyson wore Everlast gloves during his prime and championship fights. For training, he used Tyson Pro Vintage Standard Gloves by Thee Combat Corporation. Recently, he endorses Venum Tyson Pro Competition Gloves, made from top-grain cowhide leather and approved for professional bouts.
How To Make Boxing Gloves Easy?
To make boxing gloves easily, use foam padding, durable fabric, and strong stitching. Shape them with a glove mold for a perfect fit.
Will 12 Oz Boxing Gloves Fit Me?
12 oz boxing gloves suit most adults with average hand size for training and sparring. Check your hand circumference to ensure proper fit.
Conclusion
Drawing a boxing glove can be simple and fun. Start with basic shapes and add details step by step. Practice often to improve your skills and confidence. Use clear lines and take your time to get the right form. Soon, you will create gloves that look real and strong.
Keep enjoying the process and share your art with friends. Drawing is about patience and creativity. Every sketch helps you grow as an artist. Try different styles and colors to make your glove unique. Keep drawing, and you will see great progress!