Is your glove box hinge broken and making it impossible to close the compartment properly? You’re not alone, and the good news is that fixing it doesn’t have to be expensive or complicated.
Whether the hinge snapped, loosened, or just won’t hold the door right, you can get your glove box working smoothly again with a few simple tools and easy steps. In this guide, you’ll learn practical tips and quick fixes that save you time and money, so you can stop dealing with that annoying flap and get back to enjoying your ride.
Keep reading, because the solution might be easier than you think!
Tools And Materials Needed
Fixing a broken glove box hinge requires the right tools and materials. Having everything prepared makes the repair smooth and fast. This section lists what you need before starting the job.
Gathering basic tools ensures you can remove old parts and install new ones easily. Replacement parts are essential to restore the hinge’s function. Optional supplies can help improve the repair quality and durability.
Basic Tools
- Screwdriver set (Phillips and flathead)
- Socket wrench or ratchet set
- Pliers
- Trim removal tool or plastic pry tool
- Flashlight or work light
- Cleaning cloth
Replacement Parts
- Glove box hinge (specific to your vehicle model)
- Screws or bolts for mounting the hinge
- Hinge pins (if applicable)
Optional Supplies
- Lubricant spray for smooth hinge movement
- Epoxy or plastic adhesive for minor cracks
- Sandpaper for smoothing rough edges
- Masking tape to protect surrounding areas
- Gloves to keep hands clean
Diagnosing The Damage
Diagnosing the damage is the first step in fixing a broken glove box hinge. This process helps you understand the problem clearly. It also guides you on the tools and parts needed for repair. Careful inspection avoids unnecessary replacement and saves money.
Identifying Hinge Problems
Start by opening and closing the glove box slowly. Notice any unusual sounds like creaks or clicks. Check if the glove box feels loose or wobbly. Look for visible cracks or broken pieces on the hinge area. Sometimes, screws may be loose or missing. These signs point to hinge issues that need fixing.
Assessing Glove Box Condition
Examine the glove box door for cracks or warping. Check the latch to see if it locks and unlocks properly. Inspect the surrounding dashboard area for damage. Dirt or debris can also affect the hinge’s function. Clean the area to see if the movement improves. This step helps decide if a simple repair or full replacement is necessary.
Removing The Glove Box
Removing the glove box is the first step to fix a broken hinge. It allows clear access to the damaged parts. Careful removal helps avoid further damage to the glove box and surrounding areas. Follow simple steps to detach the glove box safely and reach the hinge.
Detaching The Glove Box Door
Open the glove box fully. Look for the stops or tabs on the sides. Press or push these stops inward to release the door. Some models have screws holding the door; remove them with a screwdriver. Gently pull the door away from the dashboard once all stops or screws are free. Place the door on a clean surface to prevent scratches.
Accessing The Hinge Area
With the door removed, locate the hinge area inside the glove box frame. Remove any screws or clips securing the hinge. Use a flashlight to see small parts clearly. Clean the area to remove dust and debris. Now the hinge is fully exposed and ready for repair or replacement.
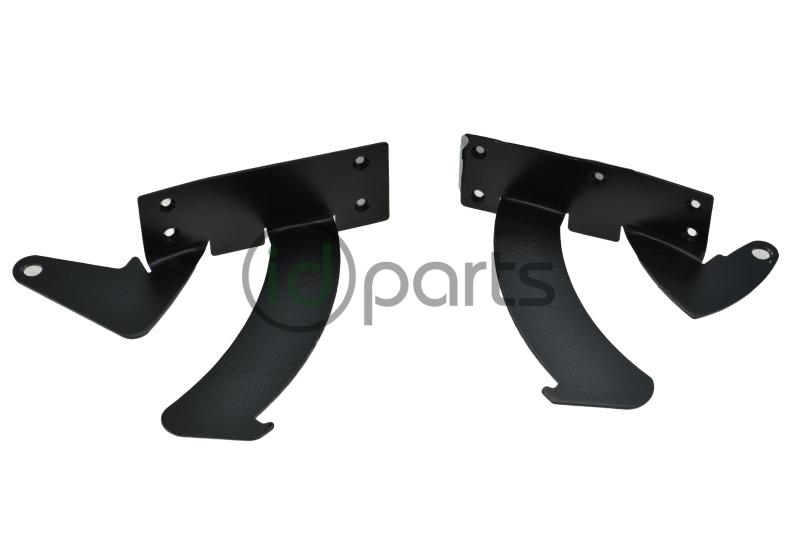
Credit: www.idparts.com
Repair Techniques
Repairing a broken glove box hinge can restore its function and prevent further damage. Different techniques suit various types of breaks and tools available. Choose a method that fits your situation and skill level. Below are some practical repair techniques to fix a glove box hinge effectively.
Tightening Loose Screws
Start by checking the screws holding the glove box hinge. Loose screws often cause the hinge to wobble or fail. Use a screwdriver to tighten any loose screws. Replace missing screws with new ones of the same size. This simple step can fix minor issues quickly and save time.
Using Cable Ties As Temporary Hinges
Cable ties work well as a quick fix for broken hinges. Thread two or three cable ties through the hinge holes. Pull them tight to hold the glove box door in place. Trim the excess ends of the ties for a clean look. This method keeps the glove box functional until a proper repair is possible.
Metal Strip Reinforcement
A metal strip can strengthen a cracked or weak hinge. Cut a small strip of metal to fit over the broken area. Drill holes in the strip matching the hinge holes. Attach the strip with screws to hold the hinge firmly. This reinforcement adds durability and prevents further damage.
Plastic Welding And Adhesives
Plastic welding melts the broken plastic parts back together. Use a plastic welding kit or a soldering iron designed for plastics. Heat the broken edges and press them firmly until they bond. For less severe breaks, strong plastic adhesives work well. Apply glue to the crack and hold it until dry. These methods restore the hinge’s shape and strength.
Replacing The Hinge
Replacing a broken glove box hinge restores your car’s functionality quickly. It keeps the glove box door secure and easy to open and close. This process is simple and requires only a few tools. Follow these steps to replace the hinge properly.
Finding The Right Replacement
Start by identifying your car’s make, model, and year. This information helps you find the correct hinge. Search online or visit an auto parts store with your details. Check for hinges made from durable materials to ensure long-lasting repairs. Compare prices and reviews to pick the best option. Avoid generic parts that may not fit well or fail soon.
Removing The Old Hinge
Open the glove box and empty its contents. Locate the broken hinge inside or on the side of the glove box door. Use a screwdriver or socket wrench to remove screws holding the hinge. Keep the screws safe if the new hinge uses the same ones. Gently detach the old hinge without damaging surrounding parts. Clean the area to remove dirt or debris before installing the new hinge.
Installing The New Hinge
Align the new hinge in the same position as the old one. Insert screws and tighten them securely but not too tight. Test the glove box door by opening and closing it several times. Ensure it moves smoothly and stays closed when shut. Adjust the screws slightly if the door is loose or hard to move. Your glove box should now work like new with the replaced hinge.

Credit: eliesaabtowers.ro
Adjusting And Testing
Adjusting and testing are key steps after fixing a broken glove box hinge. Proper alignment and smooth operation ensure the glove box works like new. This stage helps catch any issues before finalizing the repair. Follow these steps to align and test the glove box door carefully.
Aligning The Glove Box Door
Start by closing the glove box door gently. Check if the edges line up evenly with the dashboard. If the door sits unevenly, loosen the hinge screws slightly. Move the door until it fits flush and straight. Tighten the screws once the alignment looks correct. Avoid over-tightening to prevent damage to the hinge or door.
Check the gaps around the door. They should be even on all sides. Uneven gaps can cause the door to stick or not close properly. Adjust the door position gradually and test it multiple times to get the perfect fit.
Checking Closing Mechanism
Open and close the glove box door several times. The movement should feel smooth and natural. Listen for any unusual noises like grinding or clicking. These sounds may indicate misalignment or a loose hinge.
Test the latch to ensure the door stays closed firmly. If the door pops open or feels loose, adjust the latch or hinge screws. A secure closing mechanism prevents the glove box from opening while driving.
Apply light pressure on the door edges as you close it. This helps check if the door seals tightly against the dashboard. A proper seal keeps dust and dirt out of the glove box.
Preventive Maintenance Tips
Preventive maintenance helps keep your glove box hinge working smoothly. Small actions can stop bigger problems later. Regular care saves time and money on repairs. Follow simple tips to extend the life of your glove box hinge.
Lubricating Hinges
Apply lubricant to the glove box hinge every few months. Use a silicone spray or light oil for best results. This reduces friction and prevents rust. Avoid heavy grease as it can attract dirt. A smooth hinge means easier opening and closing.
Avoiding Excessive Force
Open and close the glove box gently. Do not slam it shut or force it open. Excessive force can crack the hinge or damage the latch. Teach family members and passengers to handle it with care. Gentle use helps the hinge last longer and stay aligned.

Credit: www.youtube.com
Cost Considerations
Fixing a broken glove box hinge involves several cost factors. Understanding these helps you decide on the best repair method. Costs vary widely based on repair type and vehicle model. Planning ahead avoids unexpected expenses.
Diy Vs Professional Repair
Doing the repair yourself saves money on labor. You only pay for parts and tools. Basic repairs like tightening screws or replacing hinges fit this category. Some jobs require special tools or skills, making DIY harder.
Professional repairs cost more due to labor fees. Experts handle complicated problems quickly. They ensure the job is done right the first time. This option suits those without time or repair skills.
Parts And Labor Expenses
Replacement parts vary in price depending on the vehicle. Common cars have cheaper parts than luxury models. Glove box hinges typically cost between $10 and $50.
Labor charges depend on shop rates and repair time. Simple fixes might take less than an hour. Complex replacements can take several hours, raising costs. Always ask for a clear estimate before work begins.
Frequently Asked Questions
How Do I Fix A Broken Hinge?
To fix a broken hinge, tighten loose screws or replace damaged parts. Use cable ties or metal strips for temporary support. Sand and lubricate the hinge to improve movement. Replace the entire hinge if it’s severely damaged. Always use proper tools for safe and effective repair.
How To Fix Glovebox That Won’t Close?
Tighten loose screws on the glovebox latch or hinge. Check for debris blocking closure. Lubricate hinges to ease movement. Replace broken parts if needed.
How Much Does It Cost To Fix A Broken Glove Box?
Fixing a broken glove box costs $20 to $150, depending on damage severity, parts, and labor. DIY repairs can reduce expenses.
Can A Plastic Hinge Be Repaired?
Yes, a plastic hinge can be repaired using adhesive, epoxy, or by reinforcing with metal strips for durability.
Conclusion
Fixing a broken glove box hinge can save you time and money. Simple tools often do the job well. Tightening screws or replacing small parts works in many cases. Taking care of the repair yourself avoids costly labor fees. Your glove box will function smoothly again.
Small fixes keep your car’s interior neat and safe. Try these easy steps before considering a full replacement. Maintenance like this helps extend your vehicle’s life. Don’t let a broken hinge cause frustration or mess. A little effort brings back convenience and order fast.