
Is your glove box latch stuck or broken, making it impossible to close your glove compartment properly? If so, you know how frustrating it can be to deal with a loose or jammed glove box, especially when you need quick access to your important documents or essentials.
But don’t worry—fixing a broken glove box latch is easier than you might think, and you can often do it yourself without expensive repairs or trips to the mechanic. You’ll discover simple, step-by-step solutions to get your glove box working smoothly again.
Keep reading, and by the end, you’ll have the confidence and know-how to restore your glove box latch quickly and effectively!
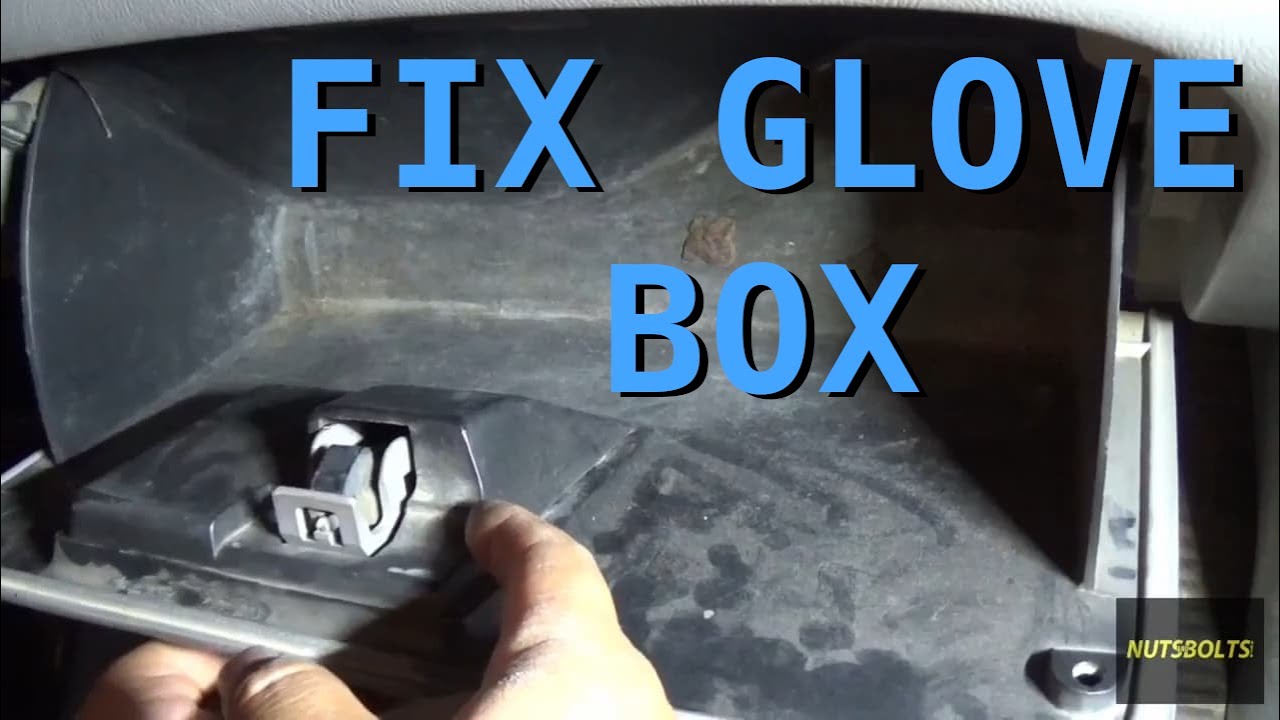
Common Glove Box Latch Problems
The glove box latch is an important part of your car’s interior. It keeps the glove box door closed and secure. Problems with the latch can make it hard to use the glove box. Many common issues cause the latch to stop working properly. These problems often need simple fixes. Understanding these issues helps in repairing the latch quickly and easily.
Latch Won’t Close
The latch may not close because of misalignment. Dirt or debris can block the latch from locking. Sometimes the latch spring loses tension. This causes the latch to stay open or loose. Checking the latch and cleaning the area often solves this problem. Tightening loose screws can help the latch close firmly.
Latch Stuck Or Jammed
A stuck latch usually happens due to rust or dirt buildup. The latch mechanism may be dry and need lubrication. Cold weather can cause the latch to freeze or become stiff. Applying a lubricant spray can free the latch. Gently moving the latch back and forth helps loosen it. Avoid forcing the latch hard to prevent more damage.
Broken Or Missing Parts
Sometimes, parts of the latch break or fall off. Plastic components can crack from wear or impact. Missing screws or clips cause the latch to become loose or fall off. Replacing broken or lost parts is necessary for proper function. Replacement parts are often affordable and easy to find. Using the right tools ensures a secure and lasting repair.
Credit: www.youtube.com
Tools And Materials Needed
Fixing a broken glove box latch requires having the right tools and materials. Using proper equipment makes the repair easier and more efficient. Gather everything before starting to avoid interruptions. Below are the essentials you need for a smooth repair process.
Basic Hand Tools
Start with simple hand tools. A screwdriver set is necessary, especially Phillips and flathead types. Pliers help to grip and adjust small parts. A socket wrench set can remove bolts if needed. Having a flashlight aids visibility inside the glove box area. Keep a small container for screws and clips to avoid losing them.
Replacement Parts
Identify the exact replacement latch for your vehicle model. Purchase an OEM or compatible latch from trusted sources. Sometimes, the latch spring or catch may also need replacement. Check if new screws or clips come with the replacement part. Having the correct parts ensures a lasting fix.
Lubricants And Adhesives
Use a silicone spray or white lithium grease to lubricate the latch mechanism. This prevents sticking and improves movement. Avoid heavy oils that attract dirt. A small amount of adhesive or epoxy can secure broken plastic pieces. Apply glue carefully to avoid excess mess. Proper lubrication and bonding extend the repair life.
Opening A Jammed Glove Box
A jammed glove box can be frustrating. It blocks access to important items inside your car. Fixing it does not require special tools or skills. Careful steps help you open the stuck compartment without damage. Follow these simple methods to gain entry safely and prepare for repair.
Gentle Pressure Techniques
Start by applying light pressure on the glove box door. Push or pull gently while trying to open it. Avoid forcing it hard as this may break the latch further. Sometimes, small movements free the stuck parts inside. Repeat the motion slowly to find the right angle to release the jam.
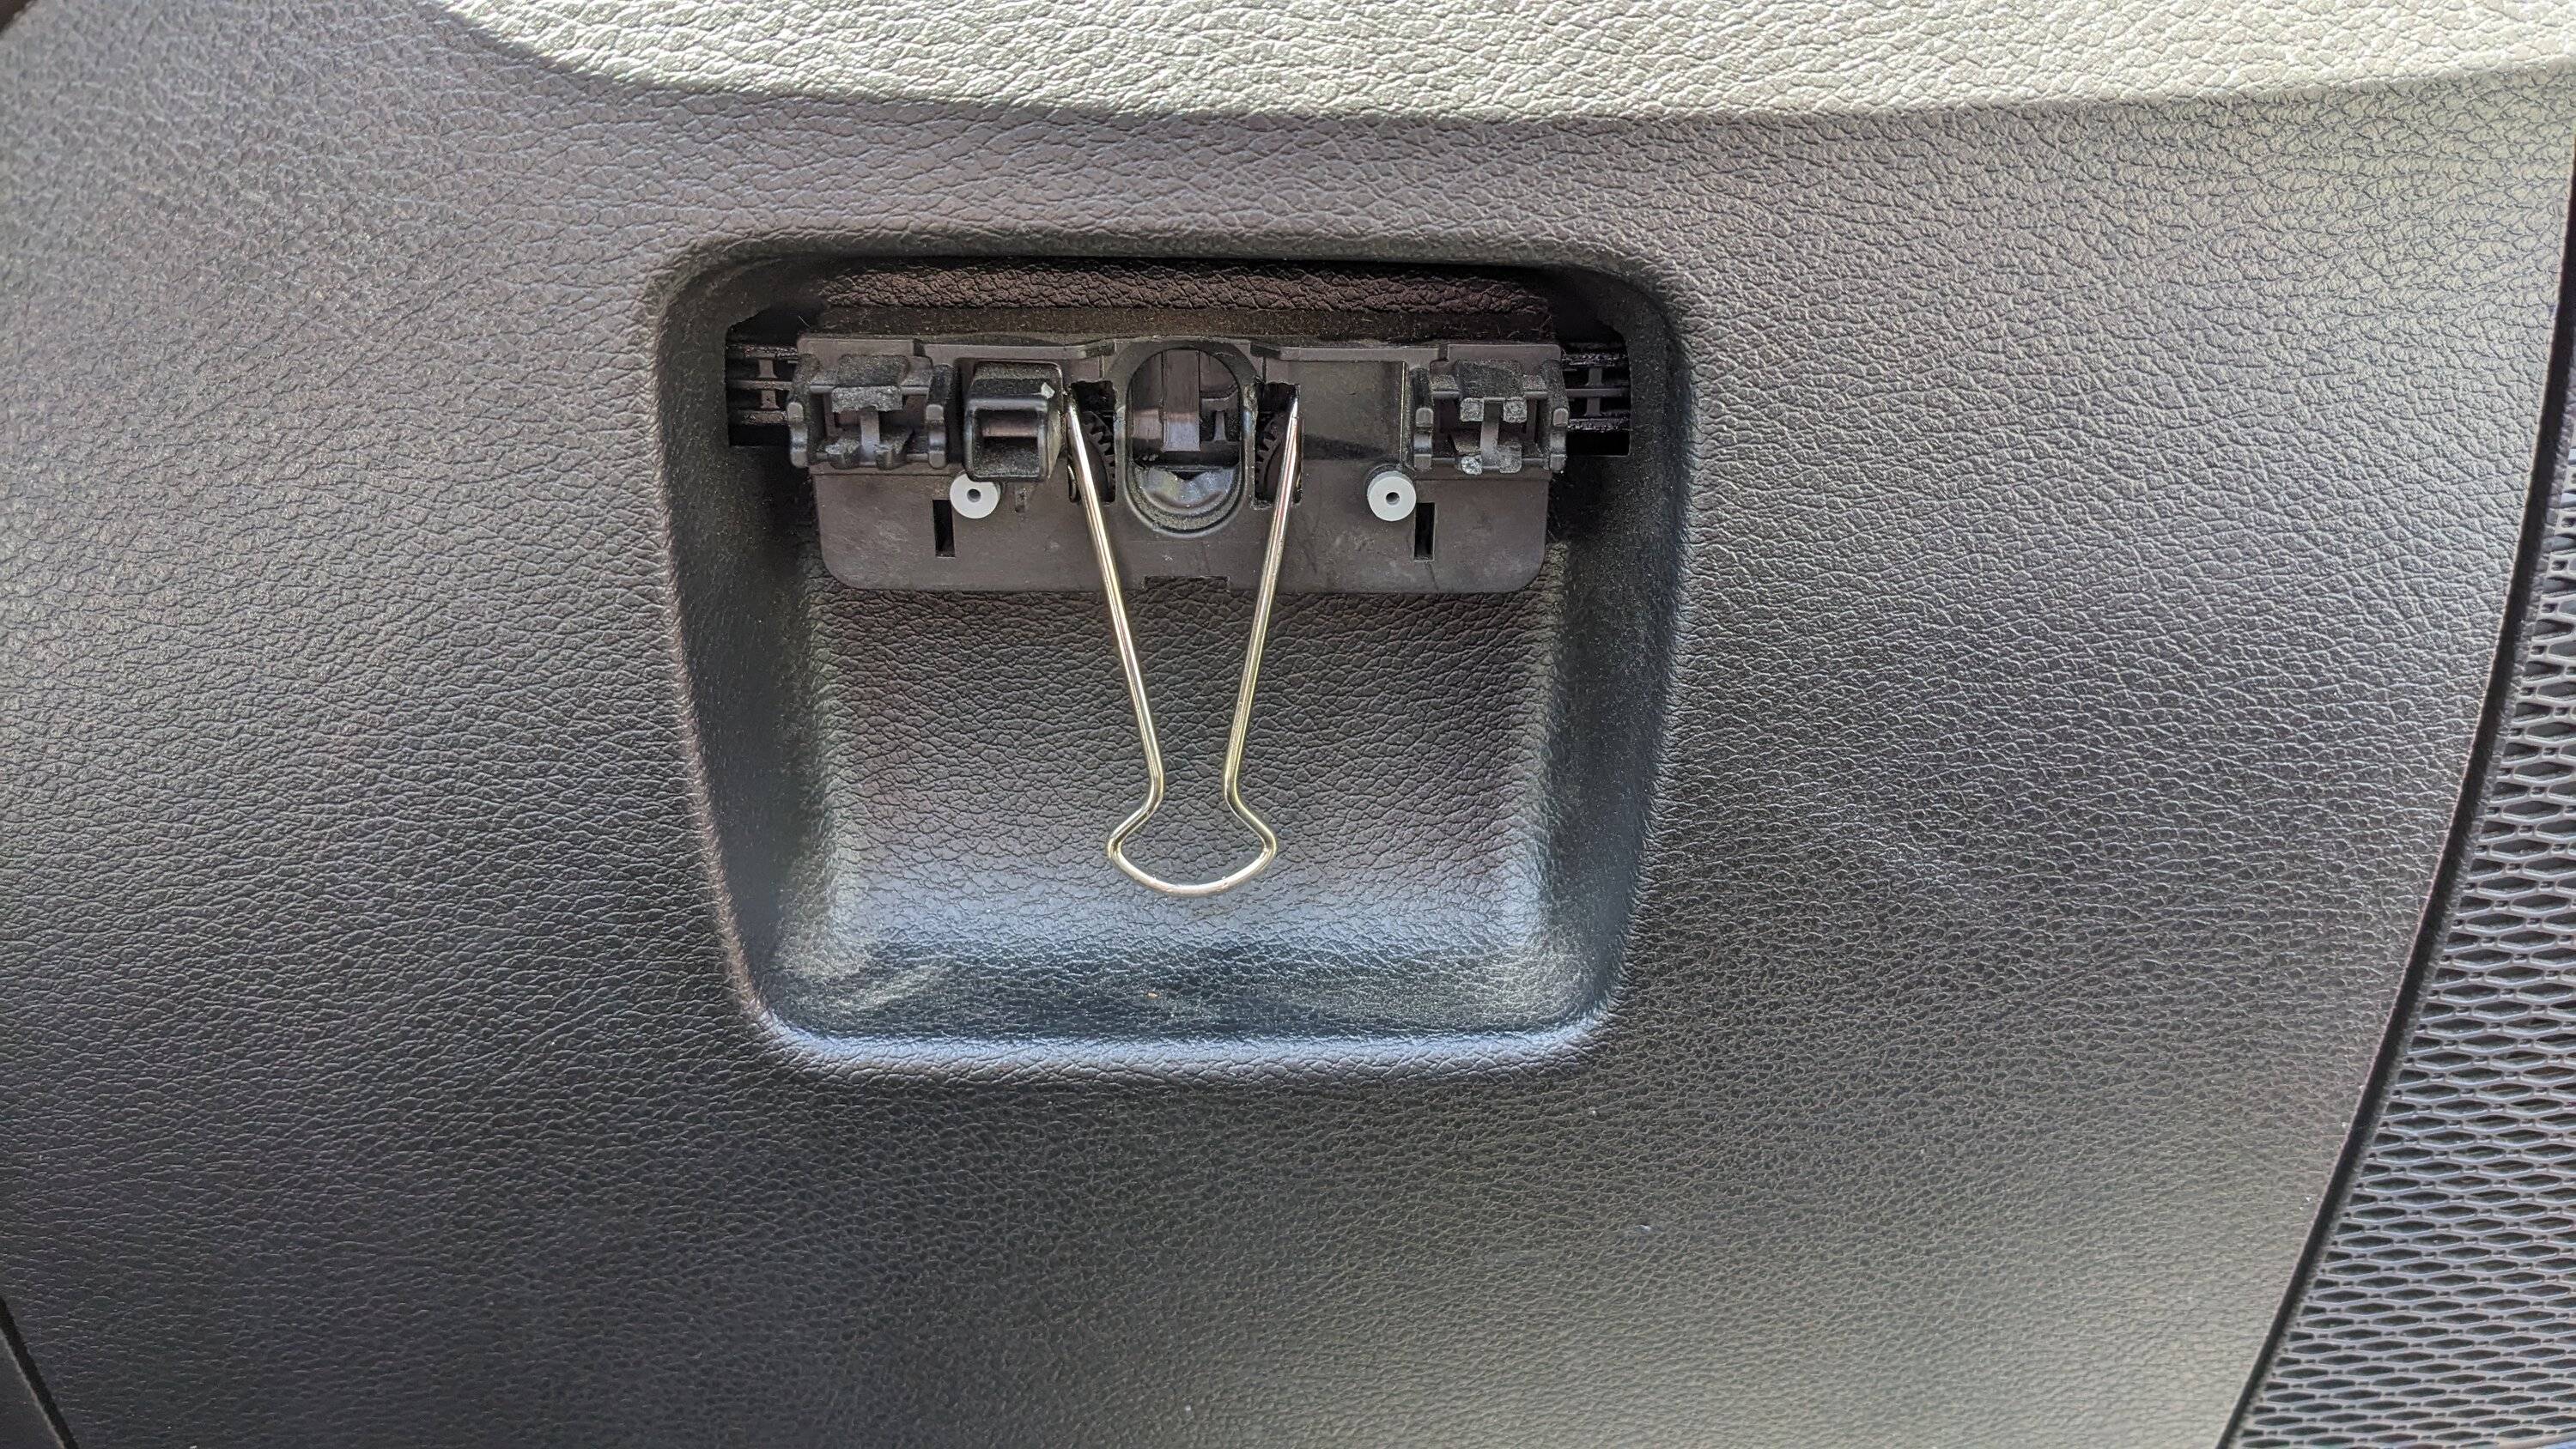
Using Pry Tools Safely
Use a plastic pry tool or a flat-head screwdriver covered with tape. Insert it carefully along the edges of the glove box door. Gently wiggle the tool to loosen the latch area. Avoid metal tools that can scratch or damage the dashboard. Work slowly to prevent cracking plastic or bending parts.
Avoiding Further Damage
Do not rush or use excessive force. Check for visible screws or fasteners that might hold the latch. Lubricate the latch mechanism with a spray lubricant if possible. Keep the tools and hands clean to avoid dirt inside the latch. Protect the surrounding areas with tape or cloth to prevent scratches.
Fixing Loose Or Misaligned Latch
A loose or misaligned glove box latch can stop the glove box from closing properly. This issue is common and easy to fix. Small adjustments can save you from replacing the entire latch. Follow simple steps to tighten and align the latch correctly. Proper alignment ensures the glove box locks securely and opens smoothly.
Tightening Screws
First, open the glove box fully. Locate the screws that hold the latch in place. Use a screwdriver to tighten each screw firmly. Loose screws cause the latch to shift and not catch properly. Check all screws around the latch and the glove box door. Tightening these screws often solves the problem immediately.
Adjusting Latch Position
If tightening screws does not fix the issue, adjust the latch position. Loosen the screws slightly to move the latch. Slide the latch until it aligns with the catch on the glove box frame. Close the glove box gently to test the fit. Once aligned, tighten the screws again to secure the latch. This adjustment helps the latch catch firmly and prevents it from slipping.
Replacing Broken Latch Components
Replacing broken latch components restores your glove box’s function quickly. This process involves careful removal, replacement, and reassembly. Step-by-step guidance makes the task manageable for beginners. Tools needed are usually simple and easy to find. Follow clear instructions to avoid damage and ensure a perfect fit.
Removing The Glove Box Door
Start by opening the glove box fully. Locate the screws or clips holding the door. Use a screwdriver or trim tool to remove them carefully. Keep all screws in a safe place for reassembly. Gently pull the door away from the dashboard. Avoid forcing it to prevent breaking other parts.
Swapping Out The Latch
Identify the broken latch and examine how it attaches. Usually, small screws or clips secure the latch in place. Unscrew or unclip the broken latch with precision. Align the new latch exactly where the old one was. Secure it tightly to avoid future issues. Test the latch movement before closing the glove box door.
Reassembling The Glove Box
Place the glove box door back in its position carefully. Reinsert screws or clips removed earlier. Tighten all fasteners evenly to ensure stability. Open and close the glove box to check the latch function. Make adjustments if the latch feels loose or stiff. Your glove box is now fixed and ready to use.
Lubricating And Maintaining The Latch
Lubricating and maintaining the glove box latch keeps it working smoothly. Dirt and rust often cause the latch to stick or break. A small amount of care can prevent major problems. Regular lubrication reduces friction and wear. This simple step extends the latch’s life and avoids costly repairs.
Choosing The Right Lubricant
Select a lubricant made for small mechanical parts. Silicone spray works well because it does not attract dust. Avoid heavy oils that can gum up over time. Graphite powder is another good choice for dry lubrication. Use only a small amount to prevent mess. Test the lubricant on a small area first. This prevents damage to plastic parts around the latch.
Regular Maintenance Tips
Clean the latch area before applying lubricant. Use a soft cloth to remove dust and debris. Check the latch for signs of wear or damage. Apply lubricant every few months for best results. Open and close the glove box several times after application. This spreads the lubricant evenly across the latch mechanism. Regular checks catch problems early. Fix small issues before they become bigger and costly.
Cost Considerations
Considering the cost of fixing a broken glove box latch helps plan your repair better. Costs vary based on repair type, parts needed, and labor involved. Understanding these factors aids in choosing the best repair option for your budget.
Diy Vs Professional Repair
Doing the repair yourself saves money on labor fees. Basic fixes like tightening screws or replacing a latch can be done at home. Professional repair costs more but ensures the job is done correctly. Complex problems may require expert tools and skills. Choosing DIY or professional depends on your comfort with car repairs.
Parts And Labor Costs
Parts for a glove box latch range from $10 to $50. Original parts cost more than generic replacements. Labor fees at repair shops vary between $50 and $150 per hour. Simple repairs take less time, lowering labor costs. Total cost depends on the part price and labor time.
Saving Money On Repairs
Buy parts online to find better prices. Use local salvage yards for used but working parts. Watch tutorial videos to guide your DIY fix. Ask friends or family for help to reduce labor costs. Regular maintenance prevents future damage and extra expenses.
Credit: www.tacomaworld.com
When To Seek Professional Help
Knowing when to seek professional help is key to fixing a broken glove box latch. Some problems are simple and can be fixed at home. Others need expert skills to avoid more damage. Recognizing these situations saves time and money.
Complex Damage
When the latch or surrounding parts are cracked or warped, the damage is complex. DIY fixes may not hold or could worsen the problem. Professionals have the right tools and parts to handle this safely. Complex damage requires careful diagnosis and repair.
Specialized Vehicles
Luxury cars, sports cars, and some older models have unique glove box designs. These need special knowledge and parts. Attempting repairs without this can cause costly mistakes. Experts know how to work on these vehicles properly and efficiently.
Avoiding Further Issues
Forcing the glove box open or using the wrong tools can break more parts. This leads to higher repair costs and more hassle. A professional can fix the latch without causing new problems. Getting help early protects your vehicle and your wallet.
Credit: www.jlwranglerforums.com
Frequently Asked Questions
How To Fix Glovebox That Won’t Close?
Tighten or replace loose or missing screws on the latch. Check for debris blocking closure. Lubricate hinges and latch for smooth operation. Align the glovebox door properly before closing. Replace the latch mechanism if damaged for a lasting fix.
Can A Car Door Latch Be Fixed?
Yes, a car door latch can be fixed by replacing or repairing the mechanism inside the door panel.
How Much Does It Cost To Fix A Broken Glove Box?
Fixing a broken glove box costs between $20 and $150. Simple repairs like tightening screws cost less. Full replacements or luxury car parts increase expenses. DIY fixes save labor fees but require tools. Vehicle make and damage severity influence the final price.
How To Open Glove Compartment When Broken?
Use a flat tool to gently pry around the glove compartment edge. Locate and manually release the latch mechanism. Avoid forcing it to prevent damage. If stuck, try accessing the latch from under the dashboard or remove the glove box panel.
Conclusion
Fixing a broken glove box latch is simple and saves money. Most repairs need only a few tools and little time. Tighten screws, replace parts, or lubricate hinges for smooth closing. Taking action yourself avoids expensive mechanic fees. Keep your glove box secure and easy to use again.
A small fix can improve your car’s convenience quickly. Don’t let a broken latch cause frustration or clutter. Try these easy steps and enjoy a fully working glove box once more.


