Is your Sea-Doo glove box latch broken or sticking, making it hard to access your gear? Don’t worry—you’re not alone, and fixing it yourself is easier than you might think.
Installing a new glove box latch can save you time and money while keeping your Sea-Doo in top shape. In this guide, you’ll find simple, step-by-step instructions that anyone can follow, even if you’re not a mechanic. By the end, you’ll know exactly how to replace your Sea-Doo glove box latch smoothly and securely.
Ready to get started? Let’s dive in and bring your glove box back to life!
Credit: www.aliexpress.com
Parts Needed
Before starting to install a Sea Doo glove box latch, gather all necessary parts. Having the right components ready makes the job smoother. It also ensures a secure and proper fit for your glove box. Below is a breakdown of the parts and tools needed for this task.
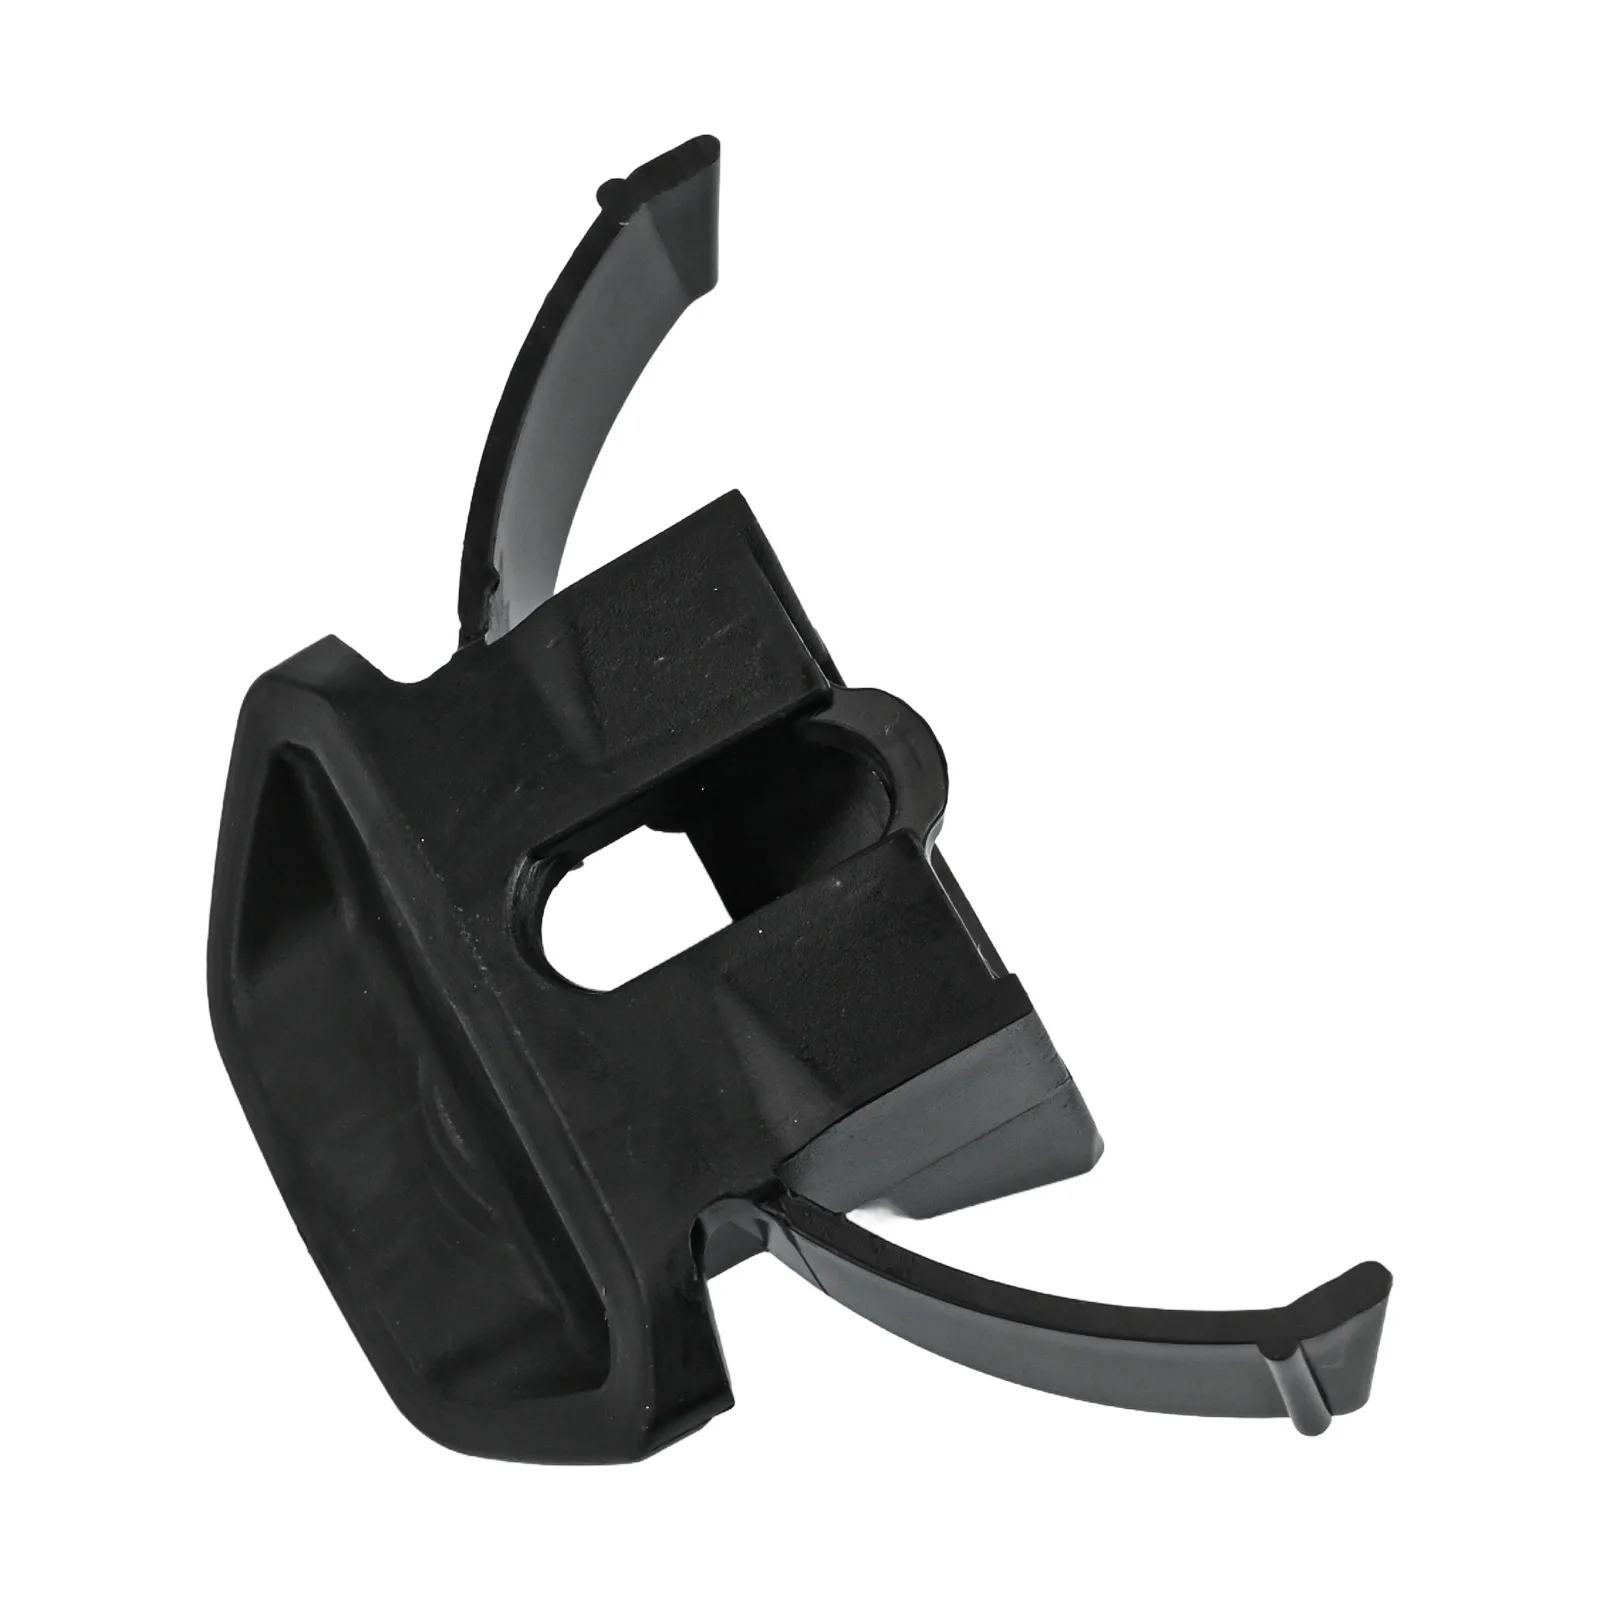
Glove Box Latch Types
Choose the correct latch for your Sea Doo model. Some latches come with a spring mechanism. Others are simple snap-fit designs. Check your glove box style before purchasing. OEM latches fit best but aftermarket options may also work.
Tools Required
Basic hand tools help with the installation. You will need a Phillips screwdriver for screws. A flathead screwdriver assists in prying parts gently. Needle-nose pliers may help with small clips or springs. A clean cloth protects surfaces during work.
Additional Materials
Have some threadlocker or adhesive to secure screws. Replacement screws might be necessary if old ones are rusty. A small container keeps screws and parts organized. Gloves protect your hands and improve grip. A flashlight can aid in tight or dark spaces.

Credit: www.amazon.com
Preparing For Installation
Before installing a new Sea Doo glove box latch, proper preparation is crucial. This step ensures a smooth installation and lasting performance. Start by removing the old latch carefully. Then clean the glove box area thoroughly. These actions create a clean and ready surface for the new latch.
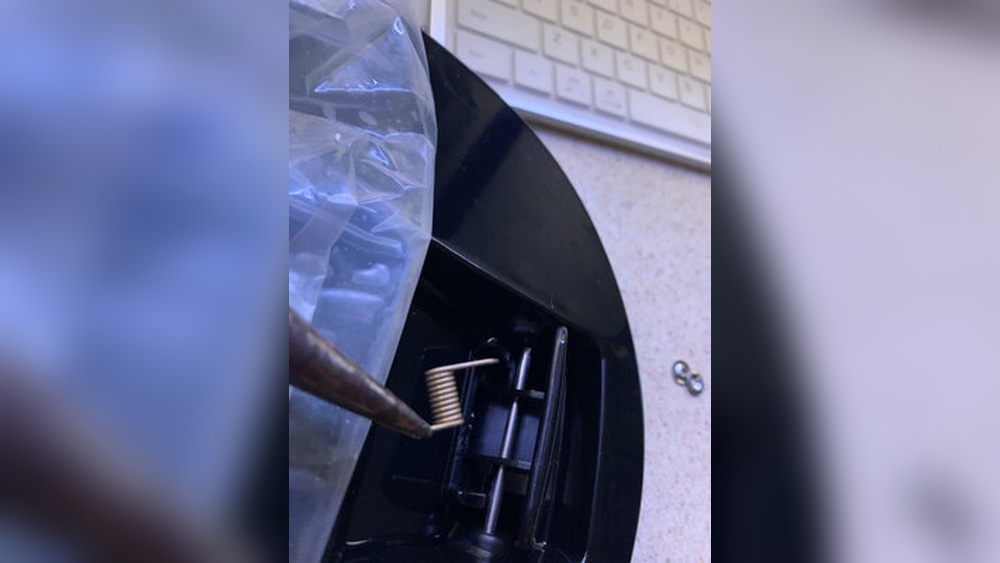
Removing Old Latch
Locate the screws or clips holding the old latch in place. Use a screwdriver to remove these fasteners gently. Avoid forcing the latch to prevent damage to the glove box. Once loose, pull the latch straight out. Set aside the old latch and screws for disposal or reuse.
Cleaning The Glove Box Area
Use a soft cloth to wipe down the glove box surface. Remove dust, dirt, and residue left by the old latch. A mild cleaner can help remove stubborn grime. Ensure the area is dry before installing the new latch. Clean surfaces help the latch fit securely and function well.
Step-by-step Installation
Installing a new Sea Doo glove box latch is simple with clear steps. Follow this guide to replace your latch easily. Each step ensures the latch fits and works well for smooth operation.
Aligning The New Latch
Start by removing the old latch carefully. Clean the area to remove dirt and debris. Place the new latch in the glove box slot. Make sure it fits snugly and lines up with the holes. Check the latch position to avoid misalignment before securing it.
Securing The Latch
Use the screws that came with your new latch. Insert them into the holes and tighten with a screwdriver. Tighten screws firmly but do not over-tighten. Over-tightening can damage the latch or glove box. Confirm the latch is firmly attached and does not wobble.
Testing The Mechanism
Close the glove box gently to test the latch. Press the latch button or handle to open the box. The glove box should open smoothly without sticking. If it does not open or close correctly, adjust the latch position slightly. Test several times until it works perfectly every time.
Troubleshooting Tips
Troubleshooting your Sea Doo glove box latch helps keep your storage secure and easy to use. Problems with the latch can stop the glove box from closing or opening smoothly. Simple fixes can save time and prevent damage. Follow these tips to handle common latch issues effectively.
Latch Won’t Close
Check for dirt or debris blocking the latch. Clean the latch and surrounding area with a soft cloth. Make sure the latch spring is not broken or loose. Tighten any loose screws holding the latch. Press the latch firmly to test if it closes properly. Replace the latch if it remains stuck or damaged.
Glove Box Jam Issues
Gently push the glove box door while pressing the latch button. Try wiggling the door slightly to free the jam. Remove any objects inside that may block closure. Inspect the latch mechanism for bent or broken parts. Use a thin tool to carefully move the latch if needed. Avoid forcing the door to prevent more damage.
Adjusting The Latch
Locate the screws on the latch assembly. Loosen them slightly to adjust the latch position. Move the latch so it aligns perfectly with the catch on the glove box door. Tighten the screws securely after adjustment. Test the latch by opening and closing the glove box several times. Repeat adjustments if the latch still does not close smoothly.
Maintenance Advice
Proper maintenance keeps your Sea Doo glove box latch working smoothly and lasting longer. Small care steps prevent major problems and costly repairs. Regular attention helps avoid latch sticking or breaking, especially in wet or salty environments.
Regular Inspection
Check the latch every few weeks for signs of wear or damage. Look for cracks, loose screws, or rust. Make sure the latch moves freely without sticking. Early spotting of issues saves time and money later.
Lubrication Tips
Apply a small amount of waterproof lubricant to the latch mechanism. Use a lubricant safe for plastic and metal parts. Avoid over-lubricating, which can attract dirt and cause clogging. Lubricate after cleaning and before storing your Sea Doo for long periods.
When To Replace
Replace the latch if it does not close or open properly despite cleaning and lubrication. Cracks, broken springs, or bent parts mean it is time for a new latch. Using a damaged latch risks losing items or water damage inside the glove box.

Credit: www.youtube.com
Frequently Asked Questions
How To Fix Glovebox That Won’t Close?
Tighten or replace loose or missing screws on the glovebox latch. Press the release button firmly while closing. Adjust or realign the latch if misaligned. Clean debris around the latch for smooth operation.
How To Open Glove Box In Volvo Xc90?
Locate the button with the open glove box symbol below the center display. Press it to release and open the glove box.
What To Do If The Glove Box Won’t Open?
Gently push the glove box door while pressing the latch or button. Wiggle the door to release the mechanism. Use a thin wire or small tool to manipulate the latch if needed. Avoid force to prevent damage. Call a locksmith if it still won’t open.
How To Open A Chevy Glove Box?
Locate the glove box latch on the dashboard or glove box door. Press or pull the latch to open it. If stuck, gently push or wiggle the door while pressing the latch to release.
Conclusion
Installing the Sea Doo glove box latch is simple and quick. Follow each step carefully to avoid mistakes. Use the right tools and parts for the best fit. A properly installed latch keeps your items safe and secure. Regular checks can prevent future problems.
Enjoy your Sea Doo with a fully functional glove box latch. Maintenance is easy once you know the process. Now, you can fix or replace the latch yourself with confidence.