You want to keep your bike safe, but buying a lock can be expensive or tricky. What if you could make a strong lock yourself?
Imagine having a lock that fits your bike perfectly and costs much less than store-bought ones. In this guide, you’ll learn simple steps to create your own bike lock using easy materials. By the end, you’ll have a reliable way to protect your bike and peace of mind wherever you go.
Ready to take control of your bike’s security? Let’s get started!
Choosing Materials
Choosing strong and durable materials is key for making a bike lock. Metals like steel offer good protection. Avoid weak materials that can break easily.
Selecting Strong Metals
Choosing the right metal is important for a strong bike lock. Steel is a good choice. It is hard to cut or break. Avoid soft metals like aluminum. They bend easily and offer less security. Look for metals that resist rust. This keeps your lock strong over time.
Using Household Items
Many household items can help build a lock. Old bike chains or metal cables work well. They are tough and easy to find. Use metal clamps or screws to hold parts together. Avoid plastic or thin wires. They break quickly and do not protect your bike.
Tools Needed
Basic tools make building a lock easier. You need a metal cutter to shape parts. A drill helps make holes for screws. Pliers can twist wires and hold pieces tight. A screwdriver is useful for fixing screws. Safety gloves protect your hands during work.
Designing Your Lock
Designing your bike lock is an important step to protect your bike. A good design keeps your bike safe and is easy to use. You need to think about how the lock works, how you open it, and how strong it is. This section explains key parts of designing a reliable bike lock.
Simple Lock Mechanisms
Start with a simple locking system. Simple locks are easier to make and use. A basic latch or bolt can hold the bike frame and wheel. Avoid complex parts that can break or confuse users. A simple mechanism reduces the chance of failure and makes the lock faster to open and close.
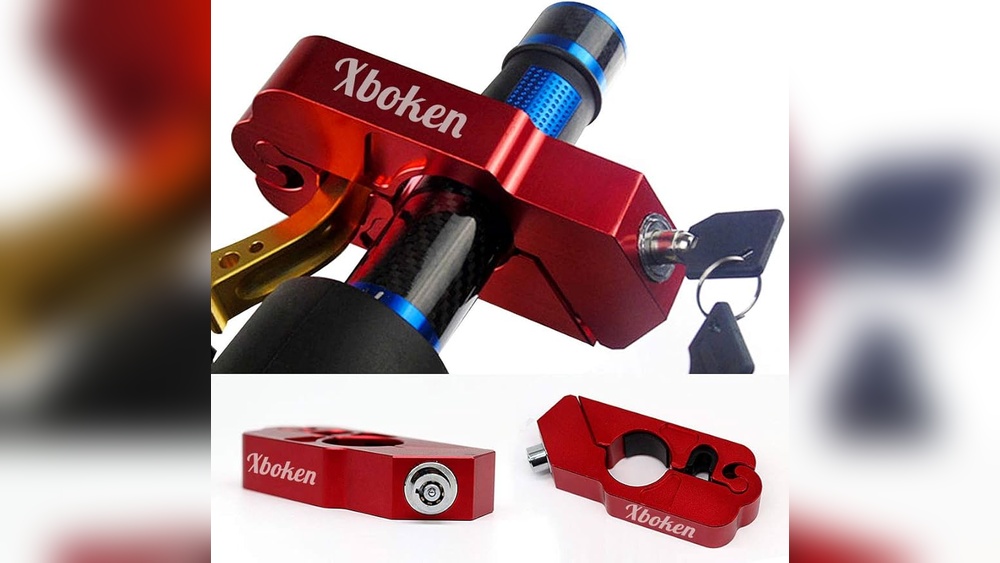
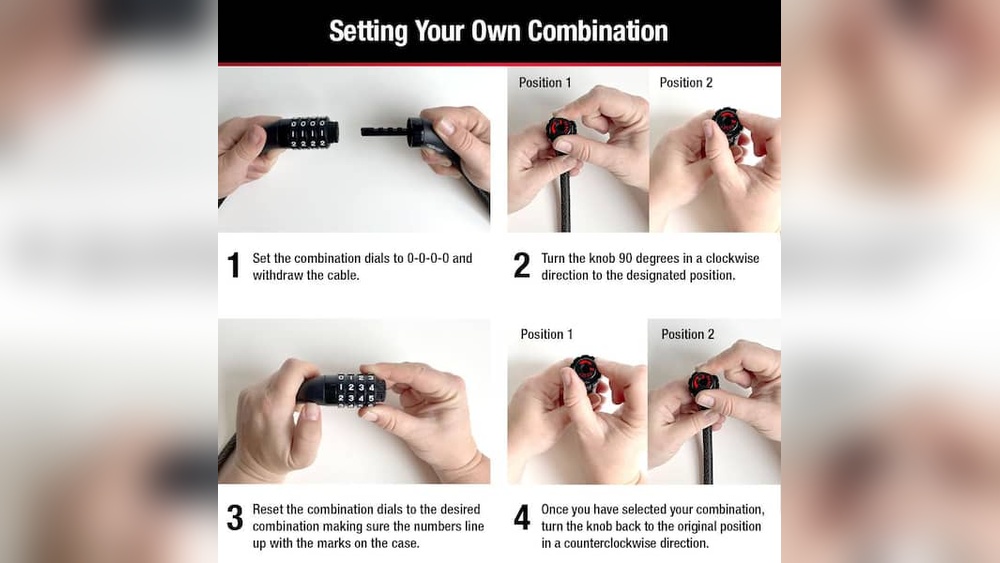
Incorporating A Key Or Combination
Decide if your lock uses a key or a combination code. Keys are easy to understand but can be lost. Combination locks do not need a key but must be easy to remember. Choose a system that fits your needs and skills. Make sure the key or code system is secure and not easy to copy or guess.
Ensuring Durability
Durability means your lock lasts long and resists tampering. Use strong materials like steel or hardened plastic. Test the lock against cutting, pulling, and twisting. Check all parts for wear and tear over time. A durable lock keeps your bike safe in many conditions and weather.
Step-by-step Assembly
Making a lock for your bike can be simple with clear steps. This section breaks down the assembly into easy parts. Follow these instructions carefully to build a strong lock. Each step focuses on a key part of the lock. Let’s start with preparing the parts you need.
Preparing Components
Gather all materials before starting. You need metal rods, screws, and a locking cylinder. Cut the metal rods to the right size. Use sandpaper to smooth sharp edges. Check that all parts fit well together. This step saves time later and prevents mistakes.
Constructing The Lock Body
Join the metal rods to create the lock frame. Use screws to hold rods tightly. Make sure the shape fits your bike’s frame. The lock body must be strong and not bend easily. Test the frame by pressing it gently. Adjust any loose parts before moving on.
Adding The Locking Mechanism
Place the locking cylinder inside the lock body. Align it with the holes on the frame. Secure the cylinder with screws so it stays in place. Insert the key to check if it turns smoothly. Fix any tight spots or jams. The locking mechanism should work without force.

Credit: transportation.ucdavis.edu
Testing Security
Testing the security of your homemade bike lock is crucial. This step ensures your lock can protect your bike effectively. You must check its strength and how well it works. This testing helps find weak spots. Fixing these weak points makes your lock safer.
Checking Strength
Start by applying pressure to the lock. Pull and twist it to see if it bends or breaks. Use tools like pliers or wrenches to test its toughness. Try hitting the lock gently with a hammer. A strong lock will resist damage and stay intact. Note any parts that seem weak or easy to break.
Testing Lock Functionality
Next, test the lock’s opening and closing mechanism. Insert and turn the key or move the locking part several times. The lock should open smoothly every time. Check if it locks tightly without any loose movement. Make sure it does not jam or stick. A good lock works well under daily use conditions.
Improving Weak Points
Identify any weak points found during testing. Reinforce these areas with stronger materials. Add extra layers of metal or tighten loose parts. Replace any parts that feel fragile or unreliable. Test the lock again after making fixes. Repeat this process until the lock feels solid and secure.
Additional Security Tips
Adding extra security steps protects your bike better. A strong lock alone may not stop thieves. Simple habits and extra tools help keep your bike safe. These tips improve your bike’s protection day and night.
Using Multiple Locks
Using two locks slows down thieves. One lock secures the frame. Another lock secures the wheels or seat. Different lock types confuse thieves. This makes stealing your bike harder and time-consuming.
Safe Parking Practices
Park your bike in busy, well-lit areas. Avoid isolated spots or dark corners. Lock your bike to a solid object. Avoid thin poles or objects that can be cut. Change parking spots often. Thieves watch for easy targets.
Maintaining Your Lock
Keep your lock clean and dry. Dirt and rust can make it weak. Oil the lock mechanism regularly. Test the lock to ensure it works well. A well-maintained lock lasts longer and stays strong.

Credit: www.purecycles.com

Credit: www.ridezygg.com
Frequently Asked Questions
How Do I Start Making A Bike Lock At Home?
Begin by selecting sturdy materials like steel or hardened cables. Gather essential tools such as a drill and lock mechanism. Follow a step-by-step guide to assemble parts securely for durability and safety.
What Materials Are Best For Diy Bike Locks?
Use hardened steel or braided steel cables for strong protection. Avoid weak metals that can be easily cut. Durable materials ensure your lock withstands tampering and theft attempts.
Can I Make A Secure Lock Without Professional Tools?
Basic tools like pliers, screwdrivers, and a drill suffice for a simple lock. Complex locks may need specialized tools. Focus on strong materials and proper assembly for security.
How Long Does It Take To Make A Bike Lock?
Depending on complexity, it usually takes 1 to 3 hours. Simple designs are quicker, while advanced locks require more time. Patience ensures a reliable and secure lock.
Conclusion
Making a bike lock is simple and practical. You save money and learn useful skills. A strong lock helps keep your bike safe. Use sturdy materials and test your lock well. Remember, a good lock adds peace of mind. Try making one and see how it works.
Protect your bike with your own homemade lock. Stay safe and enjoy your ride.