
If you own a Subaru Forester, you might find yourself needing to remove the glove box for repairs, upgrades, or just to clean it out thoroughly. But how do you do it without causing damage or frustration?
In this guide, you’ll discover simple, step-by-step instructions that make the process quick and easy. Whether you’re a beginner or just want to save time, this article will help you tackle your glove box removal with confidence. Keep reading to unlock the secrets to a smooth, hassle-free experience.
Credit: www.subaruforester.org
Tools Needed
Removing the glove box on a Subaru Forester requires a few simple tools. Having the right tools makes the task quicker and safer. Most tools are easy to find and affordable. Prepare them before starting to avoid interruptions.
Socket Wrench
A socket wrench helps remove bolts holding the glove box. Use the right socket size to avoid stripping bolts. A 10mm socket often fits Subaru Forester glove box bolts.
Flathead Screwdriver
This tool helps pry open plastic clips and panels gently. Avoid damage by using it carefully. It fits into tight spaces to release fasteners.
Phillips Head Screwdriver
Many screws in the glove box use Phillips heads. This screwdriver removes those screws quickly. Choose a size that fits screws snugly for better grip.
Trim Removal Tool
A plastic trim tool prevents scratching when removing panels. It slides under trim pieces to pop them loose. This tool protects your car’s interior finish.
Work Gloves
Wear gloves to protect your hands from sharp edges. Gloves also improve grip on tools and parts. Choose comfortable gloves for easy movement.
Credit: www.blingstrom.com
Prepare The Vehicle
Preparing your Subaru Forester before removing the glove box is important. It keeps you safe and makes the process easier. Follow these simple steps to get ready.
Taking time to prepare helps avoid mistakes and damage. A clean and safe space lets you work quickly and smoothly.
Turn Off The Engine
Make sure the engine is completely off. Remove the key from the ignition. This stops any electrical issues during the removal. It also keeps the car from moving by accident.
Clear The Glove Box Area
Empty everything from inside the glove box. Remove all papers, tools, and small items. This prevents things from falling out or breaking. Wipe the area to get rid of dust and dirt. A clean glove box helps you see screws and clips clearly.
Empty The Glove Box
Emptying the glove box is the first step in removing it from your Subaru Forester. Clearing out all items makes the process easier and safer. It also prevents any small objects from falling out or getting lost.
Take a moment to check what is inside. Remove documents, manuals, pens, or other loose items. Keep them in a safe place to avoid misplacement during the removal.
Open The Glove Box Fully
Open the glove box door all the way to access the contents. This gives you enough space to take out everything inside. It also helps in spotting any screws or latches that might be hidden.
Remove Loose Items Carefully
Take out all loose items by hand. Use gentle movements to avoid dropping anything. Check corners and compartments for small objects like coins or paper clips.
Check For Hidden Items
Look inside every pocket and compartment. Sometimes small items hide in the back or sides. Removing them prevents damage or loss during glove box removal.

Credit: www.youtube.com
Locate And Remove Screws
Removing the glove box in a Subaru Forester starts with locating and removing the screws. This step is important because the screws hold the glove box in place. Finding and taking out the screws carefully makes the process smooth and avoids damage.
Identify Screw Positions
Look inside the glove box for screws. They are usually on the sides and bottom. Some screws may hide behind plastic covers. Check the edges and corners thoroughly. Knowing screw locations helps you remove the glove box easily.
Use Proper Screwdriver
Choose the right screwdriver for the screws. Most Subaru Forester glove boxes use Phillips head screws. Using the correct tool prevents stripping the screws. A good fit makes removing screws faster and safer. Keep the screws in a small container to avoid losing them.
Detach The Glove Box
Detaching the glove box in a Subaru Forester is a simple task. It helps access the cabin filter or other parts behind it. Follow these steps carefully to avoid damage.
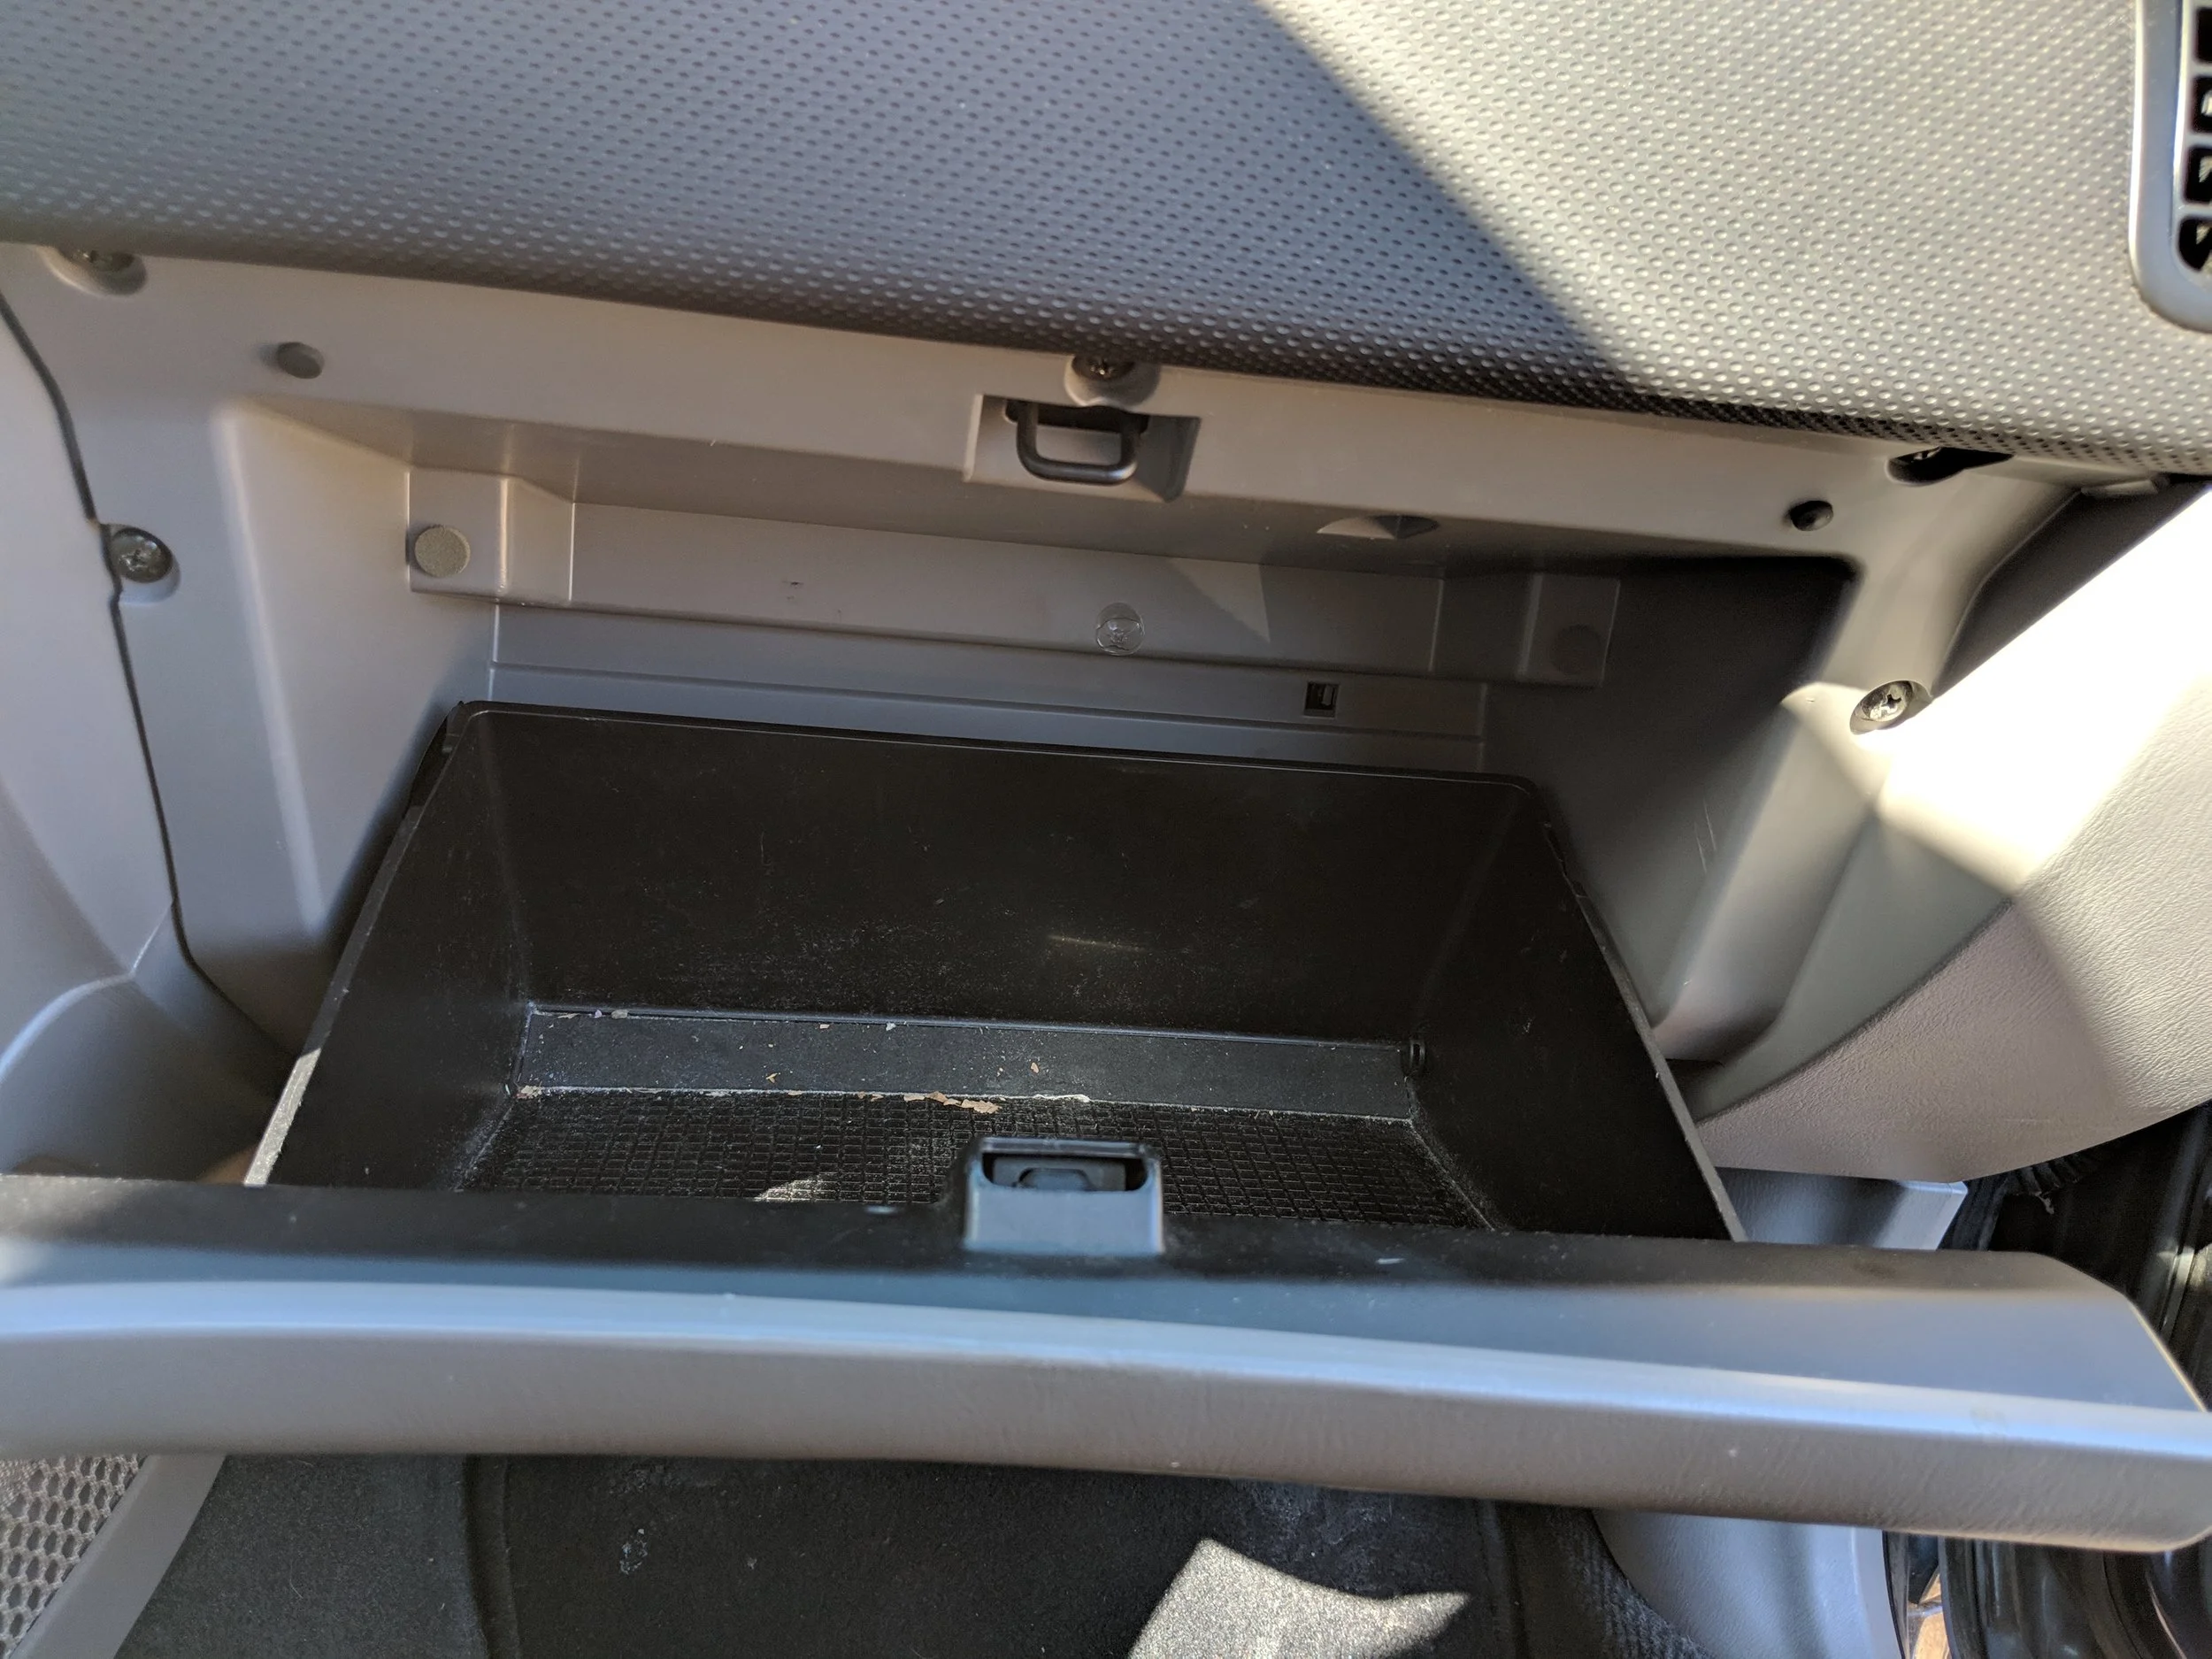
Release The Stops
Open the glove box fully. Look for the small plastic stops on each side. These stops prevent the glove box from falling out. Gently push or squeeze them to release. Use your fingers or a flat tool. Be careful not to break the stops. Once released, the glove box can move further down.
Carefully Pull Out The Glove Box
After releasing the stops, pull the glove box straight toward you. Do this slowly to avoid breaking clips or wires. Some models may have a light or damper connected. Disconnect any wires before pulling fully out. Place the glove box on a soft surface to avoid scratches. Now, you can perform maintenance or repairs behind it.
Disconnect Electrical Connections
Disconnecting electrical connections is an important step when removing the glove box on a Subaru Forester. The glove box often houses components like the cabin air filter light or a glove box light switch. These parts connect to the car’s electrical system and must be handled carefully to avoid damage.
Always make sure the car is off before starting. This prevents any electrical shorts or shocks. Handle the connectors gently. Pulling hard can break wires or connectors, causing costly repairs.
Locate The Electrical Connectors
Start by opening the glove box fully. Look inside and under the glove box for any wires or connectors. These usually link to a light or sensor. Identifying them helps avoid missing any connections during removal.
Carefully Unplug The Connectors
Press the release tab on each connector. Gently pull the plug straight out. Do not twist or yank the wires. If a connector feels stuck, wiggle it slightly to loosen. This protects the wiring and connectors from damage.
Secure The Wires After Disconnection
Once unplugged, move the wires away from the glove box opening. Use tape or zip ties to keep them safe. This prevents accidental pulling or snagging during glove box removal.
Reinstalling The Glove Box
Reinstalling the glove box in your Subaru Forester is a simple process. It involves careful steps to avoid damage and ensure everything fits perfectly. Follow these instructions to put the glove box back securely and safely.
Reconnect Electrical Parts
First, check for any electrical connectors you unplugged. These may include the light or any switches. Connect them carefully to avoid loose wires. Make sure each connector clicks into place. A loose connection can cause problems later.
Align And Secure The Glove Box
Next, position the glove box in its original spot. Align the hinges with the slots on the dashboard. Push the glove box gently but firmly. Use screws or clips to secure it tightly. Tighten all fasteners evenly to prevent rattling. Test the glove box door to ensure smooth opening and closing.
Test And Final Checks
Check that the glove box fits securely after reinstalling. Test the latch to ensure it opens and closes smoothly. Confirm no parts are loose or missing before finishing.
Check Glove Box Alignment
After reinstalling the glove box, make sure it fits properly. Open and close the glove box slowly. It should move smoothly without sticking or rubbing. If it feels tight or loose, adjust the screws or hinges. Proper alignment prevents damage and keeps the glove box secure.
Test The Lock And Latch
Test the glove box lock and latch several times. Confirm they engage and release easily. The lock should hold the glove box firmly closed. If the latch does not catch, check the mechanism for obstructions. A working lock ensures safety for your stored items.
Inspect For Loose Parts
Look under and around the glove box for any loose screws or clips. Tighten any that feel loose. Loose parts can cause noise while driving and may fall out. Secure all components to avoid future repairs.
Verify Electrical Connections
If your glove box has a light or other electrical parts, check their function. Turn on the car lights or open the glove box to see if the light works. Confirm all connectors are plugged in firmly. Faulty connections can cause electrical issues.
Frequently Asked Questions
How Do I Remove The Glove Box In A Subaru Forester?
First, open the glove box and empty its contents. Next, gently press the sides inward to release the stops. Finally, pull the glove box out carefully to remove it from the dashboard.
What Tools Are Needed To Remove Subaru Forester Glove Box?
Generally, no tools are required to remove the glove box in a Subaru Forester. The glove box is designed with stops that can be released by hand. However, a screwdriver might help to remove screws if present in older models.
How Long Does It Take To Remove The Glove Box In A Forester?
Removing the glove box in a Subaru Forester typically takes around 5 to 10 minutes. This quick task requires no special tools and is straightforward for most users with basic car knowledge.
Can I Remove The Glove Box Without Damaging It?
Yes, you can remove the glove box without damage by pressing the sides gently. Avoid using excessive force and carefully detach any clips or screws. Following the correct steps ensures safe removal without breaking any parts.
Conclusion
Removing the glove box in a Subaru Forester is straightforward. Follow the steps carefully to avoid damage. Take your time and use the right tools. Doing it yourself saves money and helps you learn. Now, you can access the area behind the glove box easily.
Keep this guide handy for future reference. Simple tasks like this boost your confidence with car repairs. Try it out and feel proud of your work.