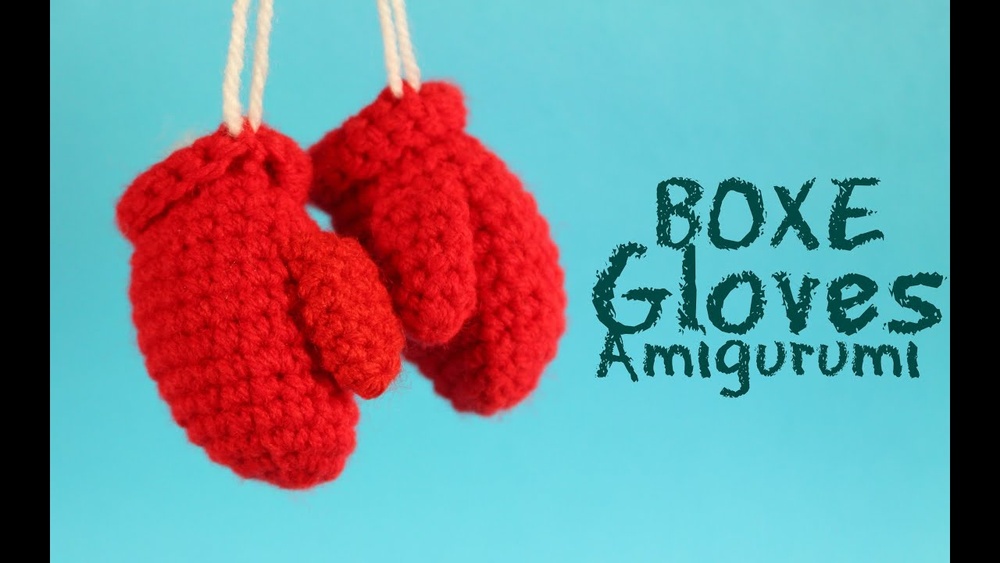
Are you ready to create something unique with your crochet skills? Imagine crafting your very own boxing gloves—not just any gloves, but cozy, handmade ones that showcase your creativity and passion.
Whether you’re a beginner or looking for a fun new project, learning how to crochet boxing gloves is easier than you think. In this guide, you’ll discover simple steps to make these stylish accessories, perfect for gifts or adding a sporty touch to your collection.
Stay with me, and you’ll have the confidence and know-how to punch boredom away with your very own pair of crochet boxing gloves!
Materials Needed
Start with worsted weight yarn in your favorite color for a soft, durable feel. Grab a crochet hook size that matches the yarn, along with a yarn needle for finishing. Scissors and stitch markers will help keep your work neat and organized.
Choosing The Right Yarn
Select yarn that is soft and durable for comfort and wear. Acrylic yarn is a good choice for beginners because it is easy to handle. Cotton yarn offers breathability but may stretch over time. Choose yarn with a medium weight to maintain the glove’s shape. Bright colors like red or blue can make your gloves stand out. Avoid yarn that is too thin or too thick, as it affects the glove’s fit.
Essential Tools
You will need a crochet hook that matches your yarn weight. A size G (4.0 mm) or H (5.0 mm) hook usually works well. Have a pair of sharp scissors ready for cutting yarn ends cleanly. Use stitch markers to keep track of your rounds and stitches. A yarn needle helps with weaving in loose ends for a neat finish. Keep a measuring tape handy to check glove size as you crochet.
Basic Crochet Techniques
Crocheting boxing gloves requires some basic skills. Knowing simple crochet stitches helps build the shape and texture of the gloves. These techniques form the foundation of your project. Practice them to create a neat and durable design.
Start by mastering stitches like single crochet and ribbing. Then, learn to work in the round for smooth, seamless pieces. These skills make your gloves look professional and comfortable.
Single Crochet And Ribbing
Single crochet is one of the easiest stitches. It creates a tight, firm fabric that holds shape well. This stitch is perfect for boxing gloves because it gives strength and structure.
Ribbing adds stretch and texture. Use front post and back post single crochet to make ribbed patterns. This technique gives the gloves flexibility and a snug fit around the wrist or fingers.
Working In The Round
Working in the round means crocheting in a circle without turning the work. This method avoids seams and creates smooth, tubular shapes.
For boxing gloves, it helps form the rounded knuckle and finger areas. Use a stitch marker to keep track of your rounds. This technique makes the gloves more comfortable and wearable.
Starting The Cuff
Starting the cuff is the first step in crocheting boxing gloves. The cuff holds the glove firmly on your wrist. A well-made cuff adds comfort and style. It also sets the base for the rest of the glove. Focus on making the cuff stretchy and snug. This helps the glove fit well and stay in place during use.
Creating A Ribbed Cuff
To create a ribbed cuff, use the front post and back post stitches. These stitches form raised ridges that look like ribs. Start with a chain that fits your wrist size. Then, work in rounds using alternating front post and back post double crochets. This pattern makes the cuff elastic. It stretches to fit your wrist and returns to its shape. Ribbing also adds a neat, professional look to your gloves.
Sizing For Comfort
Measure your wrist before you start the cuff. Use a tape measure or a piece of yarn. Wrap it snugly but not tight. The cuff should be comfortable, not loose or too tight. Adjust your starting chain length to match this measurement. Keep in mind, the ribbed cuff will stretch slightly. Check the fit as you crochet. This ensures the glove feels good and stays secure.
Credit: www.reddit.com
Forming The Glove Body
Forming the glove body is a key step in creating crochet boxing gloves. This part shapes the glove to fit the hand comfortably. It gives the glove its basic structure and strength. Start with a simple base and then add details to match the glove’s shape. Focus on the palm and hand areas for a perfect fit.
Crocheting The Palm Area
Begin by making a flat, oval shape for the palm. Use single crochet stitches for tight fabric. Count your stitches to keep the shape even. Work in rounds, increasing stitches at the ends to widen the palm. Keep the fabric firm but flexible. This base supports the rest of the glove.
Shaping The Hand
Next, build up the sides of the glove around the palm. Crochet in rounds without increasing to create height. Use half double crochet stitches for a soft, stretchy feel. Add decreases near the top to form the glove’s curve. Make sure to shape the thumb area separately. This step gives the glove its 3D form.
Making The Thumb Opening
Creating the thumb opening is a key step in crocheting boxing gloves. This opening lets your thumb move freely and makes the gloves comfortable to wear. It also gives the gloves a realistic look. There are different ways to make this opening. Choose a method that fits your skill level and pattern style.
Using Chains And Skipping Stitches
One common way to make the thumb opening is by using chains and skipping stitches. First, crochet to the point where the thumb will start. Then, make a chain of several stitches. Skip the same number of stitches on the row below. Continue crocheting after the skipped stitches. This creates a gap in the glove where the thumb fits.
When you reach the next round, work around the chain stitches to form the thumb hole edge. This method is simple and works well for beginners. It also keeps the shape neat and stretchy.
Alternative Thumb Opening Methods
There are other ways to create the thumb opening depending on the pattern. Some patterns use short rows to turn the work and leave space for the thumb. Others cut the fabric after finishing the glove and add an edging around the thumb hole. This method needs sewing skills.
Another option is to crochet the thumb separately and attach it later. This gives more control over the size and shape of the thumb. Each method has pros and cons, so try to find what fits your project best.
Finishing The Glove
Finishing the glove is a crucial step in your crochet boxing gloves project. This stage brings all parts together and shapes the glove to fit perfectly. Attention to detail here ensures comfort and durability. The glove should look neat and professional once finished.
Crocheting The Fingers
Start by creating each finger separately. Use smaller stitches for a tighter fit around the fingers. Crochet the thumb first, then move to the other fingers. Make sure the fingers are all the same length. Join the fingers to the palm with slip stitches. This step shapes the glove for a natural hand fit.
Edge Finishing Techniques
Choose a simple edging to prevent the glove from curling. Single crochet or slip stitch edges work well for boxing gloves. Add a row of scalloped or picot edging for a decorative touch. Make sure edges are even and tight to hold the glove’s shape. Finish by weaving in all loose ends securely. This step improves the glove’s look and durability.
Creating The Second Glove
Creating the second glove is a crucial step in your crochet boxing gloves project. The goal is to make a pair that looks and fits the same. This means paying close attention to details from the first glove. The second glove should mirror the first in every way. This section explains how to achieve that with simple techniques.
Mirroring Thumb Placement
The thumb is a key part of the glove’s shape and function. Start by noting the exact row and stitch where the thumb begins on the first glove. Use this as a guide for the second glove. Place the thumb on the opposite side to match the hand orientation. Count stitches carefully to keep the thumb size consistent. This step ensures your gloves will feel natural and balanced.
Ensuring Consistent Size
Size consistency is important for comfort and appearance. Use the same yarn and hook size for the second glove. Check your stitch count frequently. Compare the length and width of both gloves as you crochet. Adjust tension if needed to keep the gloves uniform. Small differences can affect how the gloves fit and look together.
Tips For Perfect Fit
Getting the right fit is key to comfortable, wearable boxing gloves. Crocheting gloves that fit well means they feel good and last longer. Focus on two important steps to ensure the perfect fit.
Start by measuring your hand carefully. Then, check your gauge to match the pattern size. These tips help avoid gloves that are too tight or too loose.
Measuring Your Hand
Use a soft tape measure for best results. Measure around the widest part of your hand, usually across the knuckles. Do not include the thumb in this measurement.
Also measure the length from the wrist to the tip of the middle finger. Write down these numbers. They will guide you in choosing the right pattern size and adjustments.
Take measurements twice to be sure. Small errors can change the glove fit a lot. Accurate hand size helps you follow the crochet pattern more precisely.
Checking Gauge
Gauge means the number of stitches and rows per inch. It shows how tight or loose your stitches are. Make a small sample swatch with your yarn and hook before starting.
Measure your swatch to see if it matches the pattern gauge. If your stitches are too big, use a smaller hook. If too small, try a bigger hook or looser tension.
Adjusting your gauge ensures the gloves fit as the pattern intends. Skipping this step can cause gloves that do not fit well.
Customization Ideas
Customizing your crochet boxing gloves lets you add a personal touch. It makes your gloves unique and fun to create. You can change colors, add patterns, or even include padding for comfort. These ideas help you design gloves that fit your style and needs perfectly.
Adding Colors And Patterns
Choose different yarn colors to make your gloves stand out. Use stripes, spots, or blocks of color for a playful look. Try color changes every few rows for stripes. Mix bright and dark shades for contrast. You can also crochet small shapes like stars or hearts on the gloves. This adds a creative flair and makes your gloves eye-catching.
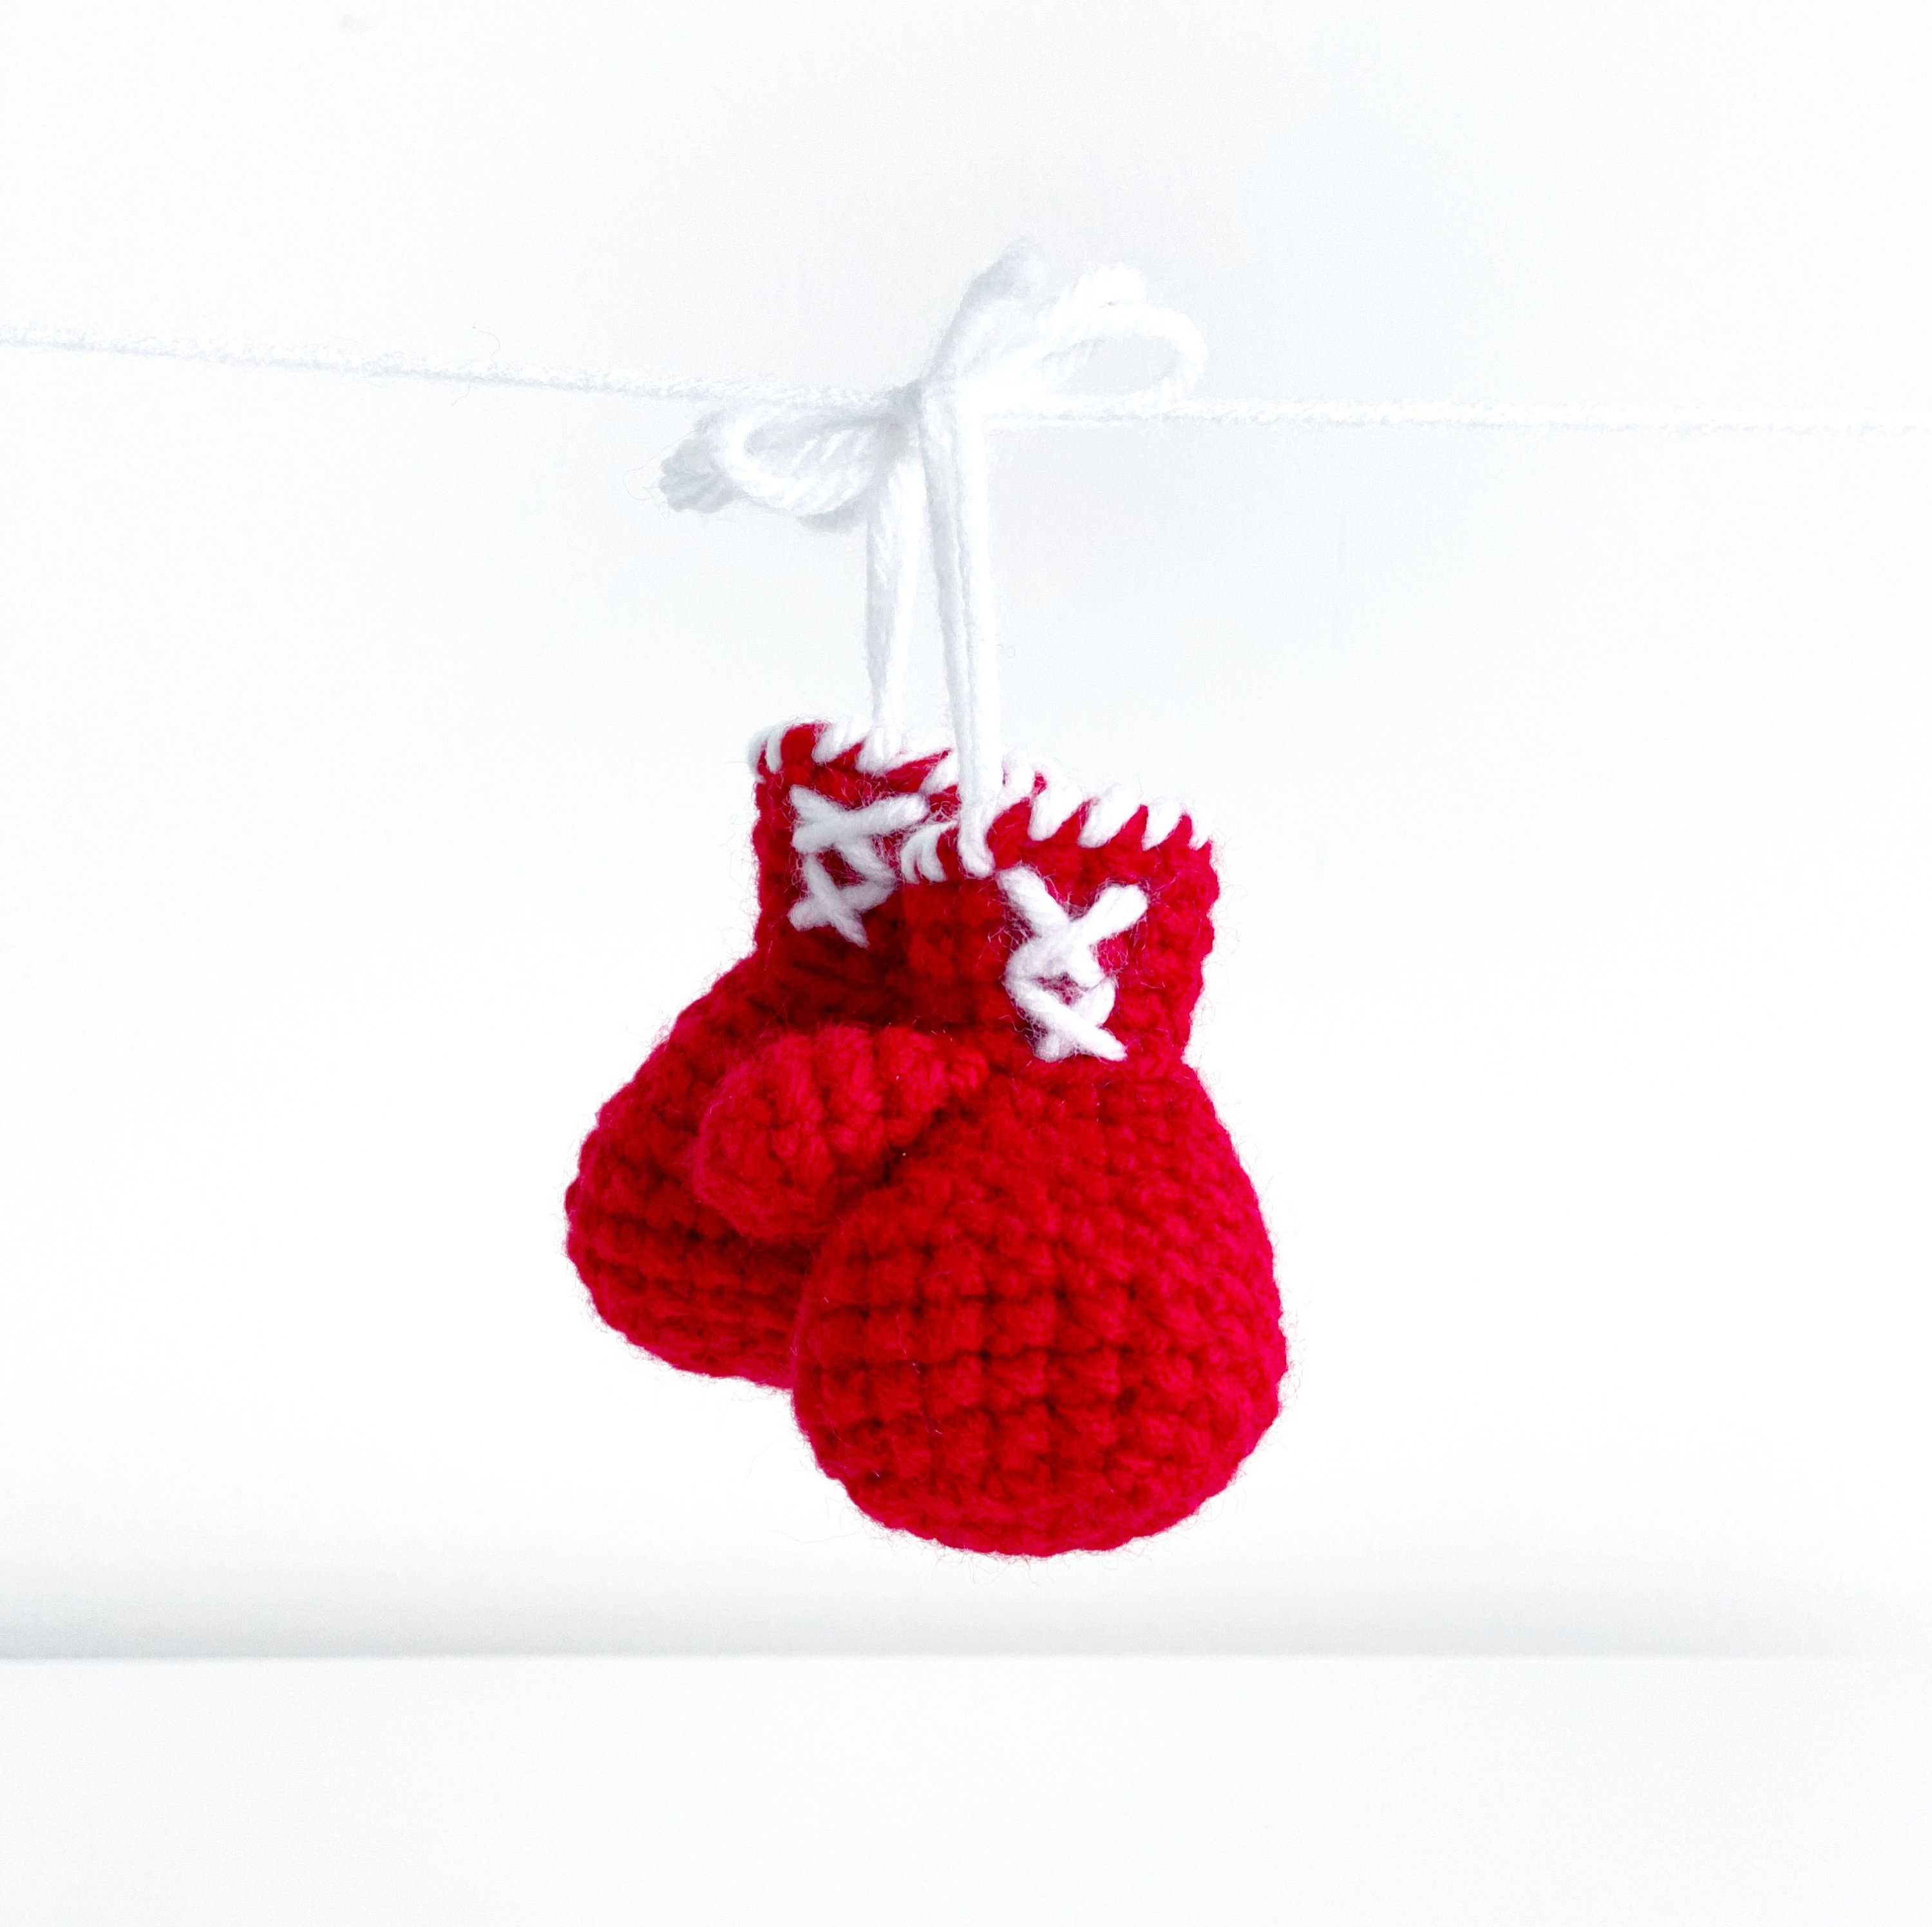
Incorporating Padding
Add soft padding inside the gloves to improve comfort. Use foam or thick felt pieces cut to glove shape. Sew or glue the padding inside before closing the gloves. This makes them feel more like real boxing gloves. Padding also protects your hands better during play. Make sure to secure the padding well so it stays in place.

Credit: www.youtube.com
Troubleshooting Common Issues
Troubleshooting common issues helps improve your crochet boxing gloves. Small fixes can save time and make gloves fit better. Check your work often to catch problems early. This section covers how to fix fit problems and repair stitches. These tips keep your gloves looking neat and wearable.
Fixing Fit Problems
Measure your hand before starting to crochet. Gloves that are too tight feel uncomfortable. Too loose gloves do not hold shape well. Add or remove stitches to adjust size. Use a smaller hook for tighter gloves. Use a larger hook for a looser fit. Check the glove on your hand often. Adjust the length by adding or skipping rows. Make sure the wrist band fits snugly. This prevents the gloves from slipping off.
Repairing Stitches
Stitches can loosen or break during crafting. Find the problem stitch quickly to prevent unraveling. Use a crochet hook to fix dropped stitches. Pull the yarn gently to tighten loose stitches. Replace broken yarn if needed. Weave in yarn ends neatly to secure stitches. Avoid pulling yarn too tight to keep stitches even. Practice fixing small mistakes to save your project. Repairing early saves undoing large sections later.
Credit: www.etsy.com
Frequently Asked Questions
How To Make Homemade Boxing Gloves?
Cut foam padding and cover with durable fabric for the glove’s body. Sew pieces securely, add wrist straps for support. Insert hand padding inside and close the glove. Ensure snug fit and comfort before use.
Is It Possible To Crochet Gloves?
Yes, you can crochet gloves, including fingerless and full-fingered styles. Fingerless gloves are easier and faster to make. Choose yarn like acrylic, cotton, or wool. Crochet the cuff, hand, thumb opening, then finish edges. Repeat steps for the second glove.
Do Pro Boxers Use 12 Oz Gloves?
Professional boxers rarely use 12 oz gloves in official matches. They typically wear 8 oz or 10 oz gloves for competition. Twelve-ounce gloves are more common in training and sparring for added hand protection and reduced injury risk.
What Type Of Yarn Is Best For Crochet Gloves?
Worsted weight yarn suits crochet gloves best for warmth and durability. Acrylic, cotton, or wool also work well. Choose soft, breathable yarn for comfort and flexibility.
Conclusion
Crocheting boxing gloves is a fun and creative project anyone can try. You only need basic materials and simple stitches. Follow each step carefully, and your gloves will take shape quickly. Practice helps improve your technique and makes the process easier.
These handmade gloves can be great gifts or decorations. Keep experimenting with colors and yarn types for unique results. Enjoy the process and the satisfaction of making something with your own hands. Happy crocheting!


