If you want to keep your bike safe and secure, installing a Master Lock is a smart move. But how exactly do you attach it so it stays firmly in place and is easy to use every time?
Whether you have a U-lock, cable lock, or combination lock, this guide will walk you through the simple steps to get it mounted right on your bike. You’ll learn how to set your lock’s combination, choose the best spot to attach it, and secure it so you never have to worry about your bike being vulnerable.
Ready to protect your ride with confidence? Keep reading to discover exactly how to install your Master Lock on your bike quickly and hassle-free.
Choose The Lock Type
Choosing the right lock type is the first step to secure your bike effectively. Different locks offer various levels of security and convenience. Picking a lock depends on your daily needs and where you park your bike.
Think about how long you leave your bike unattended and the risk level of the area. Some locks are stronger but heavier, while others are lighter but less secure. Understanding these differences helps you make a smart choice.
U-locks
U-locks are shaped like a “U” and made from hardened steel. They provide strong protection against cutting and leverage attacks. These locks are best for high-risk areas. They are heavier but offer solid security. Use a U-lock to secure your frame and a wheel to a fixed object.
Cable Locks
Cable locks are flexible and lightweight. They are easy to carry and use. Cable locks work well for low-risk areas or short stops. They are not very resistant to cutting tools. Use cable locks as a secondary lock for added security.
Chain Locks
Chain locks have thick metal links and a strong lock. They offer good security and flexibility. Chain locks are heavier and can be harder to carry. They work well in moderate-risk areas. Choose a chain lock with a protective coating to avoid bike damage.
Folding Locks
Folding locks combine portability and strength. They fold into compact shapes for easy carrying. These locks are harder to cut than cable locks. Folding locks work best for urban areas with medium theft risk. They secure your frame and wheels efficiently.
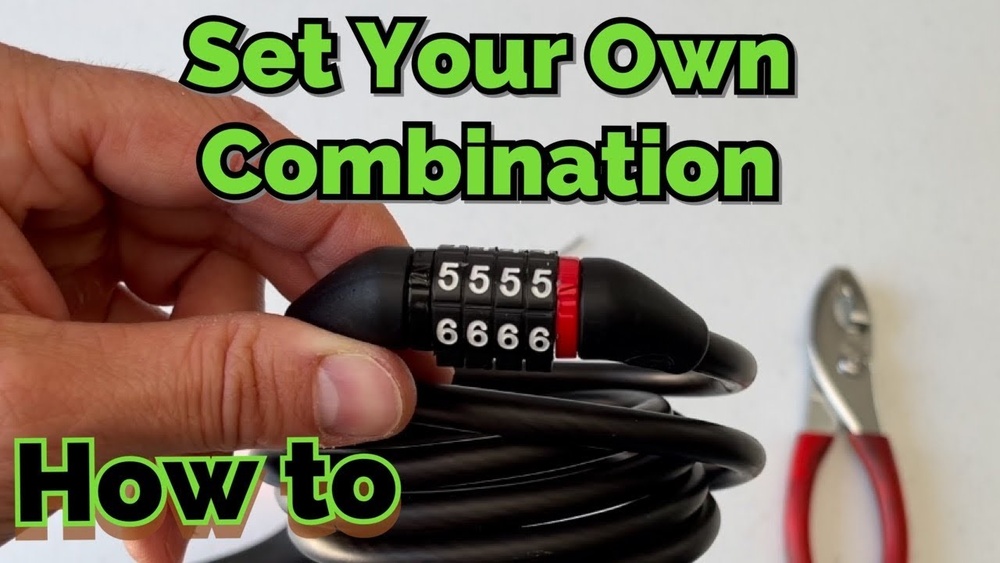
Set Your Combination
Setting your combination is a key step to securing your bike with a Master Lock. This step lets you customize the code so only you can open the lock. Follow these simple instructions carefully to set a new combination easily and safely.
Open The Lock
Start by opening the lock with the factory-set code or the current combination. Pull the shackle up to release it. Keep the lock open during the entire process to avoid mistakes. This step prepares the lock for setting your new code.
Align New Combination
Turn the dials to your chosen numbers or letters. Make sure each digit lines up correctly with the indicator line. Take your time to pick a code that is easy to remember but hard for others to guess. This makes your lock more secure.
Secure The Combination
Once your new code is aligned, press down the shackle firmly. Hold it down while you turn the lock body or reset lever back to the original position. Release the shackle and close the lock. Your new combination is now set and ready to use.
Store Your Code Safely
Write your combination down and keep it in a safe place. Avoid storing the code on your phone or in obvious spots. Having a backup prevents lockouts and saves you time. Your bike stays protected, and you stay worry-free.
Select Mounting Location
Selecting the right mounting location is essential for securing your Master Lock on your bike. A good spot keeps the lock handy and safe during rides. It should not interfere with your pedaling or handling. The lock must stay stable and not rattle or fall off.
Consider areas on your bike frame that are strong and easy to reach. The lock should be easy to remove and replace without tools. Choose a position that keeps the lock clear of dirt and water as much as possible. This helps the lock last longer and work smoothly.
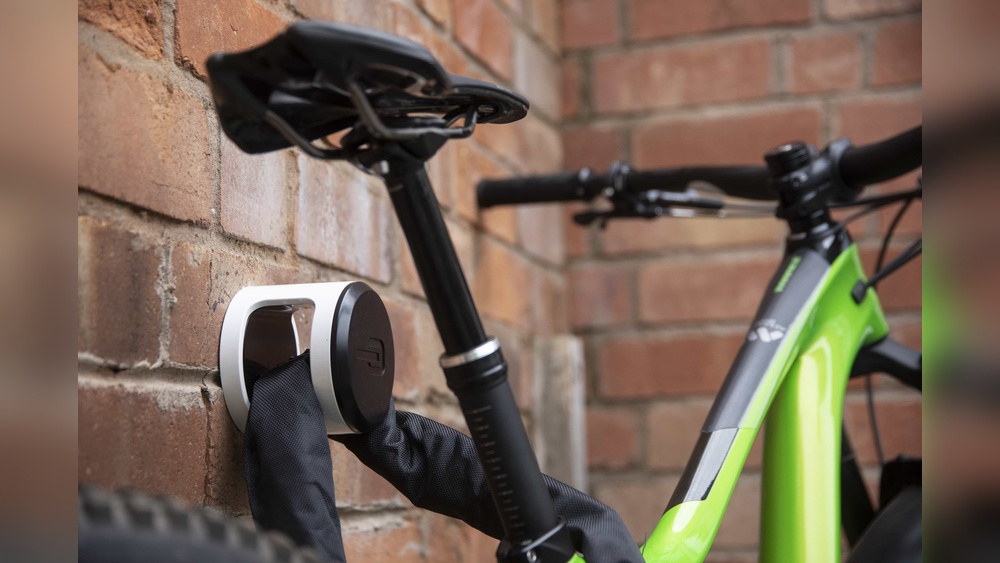
Seat Post Placement
The seat post is a popular place to mount the lock. It is strong and central on the bike. Attaching the lock here keeps it within easy reach.
Use the mounting bracket around the seat post tube. Tighten the bracket securely but avoid over-tightening. The lock should sit snug without sliding down.
This position keeps the lock out of the way of your legs. It also helps protect the lock from road debris and weather. Check that the lock does not block the seat post adjustment.
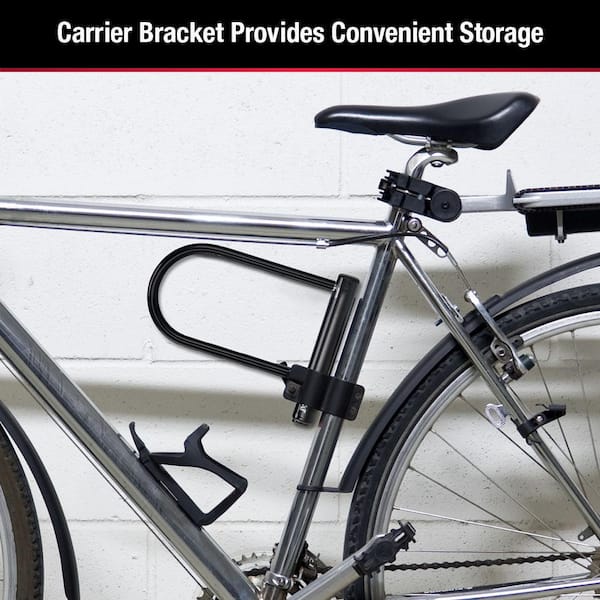
Frame Tube Placement
The main frame tubes offer another good mounting option. The down tube or top tube is often used for this. These tubes are sturdy and provide a solid base for the lock.
Place the bracket around the tube with included hardware. Make sure it fits tightly to avoid noise or movement. The lock should be secure but easy to remove when needed.
This location keeps the lock balanced on the bike. It also prevents interference with your pedals or brakes. Confirm the lock does not touch cables or accessories on the frame.

Credit: tseverinoadvocates.com
Prepare The Bracket Or Collar
Preparing the bracket or collar is a crucial step before mounting your Master Lock on a bike. This part holds the lock securely and protects your bike frame from scratches. Proper preparation ensures a tight fit and easy access to the lock when needed.
Take your time to arrange all components correctly. This process sets the foundation for a stable and durable lock installation.
Insert Nuts And Shims
Start by placing the nuts into their slots in the bracket or collar. These nuts will hold the screws firmly in place.
Use the shims if your bike frame has an unusual shape or size. Shims fill gaps and help the bracket fit snugly against the frame.
Insert the shims between the bracket and the bike frame as needed. This prevents the bracket from moving or scratching the frame during rides.
Place Rubber Pads
Rubber pads protect your bike frame from damage and reduce vibrations. Place them inside the bracket or collar before attaching it to the bike.
Make sure the pads cover all contact points between the bracket and the frame. This cushion keeps your bike safe and the bracket stable.
Check that the rubber pads lie flat without folds or wrinkles. Proper placement improves grip and prevents slipping.
Attach Bracket To Bike
Attaching the bracket to your bike is the first step in securing your lock for easy access. This bracket holds the lock firmly and keeps it ready for use. Proper installation ensures the lock stays in place during rides and does not rattle or fall off.
Follow each step carefully to attach the bracket to your bike frame. Use the tools and hardware that come with your lock for the best fit.
Slide Bracket Onto Frame
Locate a suitable spot on your bike frame, usually near the seat tube or down tube. Slide the bracket onto the frame so it fits snugly. Make sure it does not block any moving parts or cables. Adjust the bracket position until it feels secure and comfortable.
Insert Screws And Bolts
Use the screws and bolts provided with your lock to attach the bracket. Insert them through the holes in the bracket and into the frame mount points. Check that all parts align properly before tightening. If needed, use the plastic shims to fill any gaps and improve fit.
Tighten Hardware Securely
Use a screwdriver or wrench to tighten all screws and bolts firmly. Do not overtighten, as this might damage your bike frame or strip the threads. Check the bracket for any movement. It should stay firmly in place without wobbling or shifting.
Credit: www.homedepot.com
Secure The Lock To Bracket
Securing the lock to the bracket is a vital step in installing your bike lock. It keeps the lock firmly attached to your bike. This makes carrying the lock easier and prevents it from falling off during rides.
The bracket holds the lock close to the bike frame. It should fit tightly and not move around. A loose lock can get damaged or lost.
Choose The Right Bracket Position
Pick a spot on the bike frame that is easy to reach. Usually, the frame’s down tube or seat tube works best. Avoid places where the lock can hit your legs while riding.
Attach The Bracket Securely
Use the screws or straps included with your lock. Wrap the straps tightly around the bike frame. Tighten screws firmly with a screwdriver. Make sure the bracket does not wiggle.
Insert The Lock Into The Bracket
Slide the lock into the bracket carefully. It should click or snap into place. Test by pulling gently to ensure it stays fixed. The lock should not fall out during normal movement.
Check For Stability And Comfort
After securing the lock, check if it feels stable. Ride your bike a short distance to test. Adjust the bracket if it rattles or is uncomfortable. A stable lock means safer and easier transport.
Test Lock Functionality
Testing the lock functionality is a crucial step after installing your Master Lock on your bike. It ensures the lock works smoothly and secures your bike properly. This step helps avoid problems when you actually need to lock or unlock your bike.
Always test the lock several times before relying on it. Confirm that the combination or key mechanism operates without sticking or jamming. Check that the lock fits well in the bracket and stays firmly attached during movement.
Check The Locking Mechanism
Turn the dial or insert the key to test the locking mechanism. Make sure it opens easily with the correct code or key. The lock should snap shut firmly and not open without the right input. Repeat this action several times for consistency.
Test The Lock On The Bike
Attach the lock to the bike frame or wheel as you would normally. Secure it fully and try to move the locked parts. The lock must hold tight and not shift or come loose. This confirms the lock and bracket are installed correctly.
Verify The Bracket Stability
Shake or wiggle the lock bracket to check its stability. It should be solid and not wobble on the frame. Tighten the screws if needed to improve grip. A loose bracket can cause damage or loss of the lock.
Practice Locking And Unlocking
Practice locking and unlocking your bike several times. This builds confidence in using the lock daily. It also helps you remember the combination or key method better. Quick and smooth operation saves time and reduces frustration.

Credit: www.youtube.com
Tips For Extra Security
Securing your bike properly is key to preventing theft. Simple locks may not be enough in busy areas. Adding extra security steps helps keep your bike safe. Here are practical tips to improve your bike lock setup.
Use Multiple Locks
Using more than one lock confuses thieves. A combination of a U-lock and a cable lock works well. Lock the frame and wheels separately. This makes it harder for thieves to steal parts or the whole bike. Multiple locks also slow down theft attempts.
Choose Well-lit Locations
Park your bike in places with good lighting. Thieves avoid bright and busy areas. A well-lit spot increases the chance of being seen. This lowers the risk of theft. Look for areas near cameras or heavy foot traffic. Always avoid dark or isolated places for parking.
Avoid Legal Issues
Installing a lock on your bike helps protect it from theft. Avoiding legal issues during installation is just as important. Using a lock responsibly keeps you safe and respects others’ property. Follow simple rules to stay out of trouble and enjoy peace of mind.
Lock Only Your Own Bike
Never lock a bike you do not own. Locking someone else’s bike can cause legal problems. It may be seen as theft or vandalism. This action can block the owner from using their bike. Always secure only your personal bike to avoid conflicts.
Follow Rental Bike Policies
Rental bikes come with specific rules about locking. Use only the lock provided by the rental service. Adding your own lock can break their terms of service. This may lead to fines or loss of rental privileges. Respect rental rules to avoid legal trouble and enjoy your ride safely.
Frequently Asked Questions
How To Attach Master Lock To Bike?
Set your Master Lock combination first. Attach the mounting bracket to the bike frame using included hardware. Slide the lock into the bracket. Tighten all screws securely. Ensure the lock fits snugly and is easy to access. Store your combination safely.
How To Set A Masterlock Bike Lock?
To set a Master Lock bike lock, open it first. Align your desired combination on the dials. Turn the knob counterclockwise back to the original position. Your new combination is now set. Insert the cable and scramble the dials to lock securely.
How To Attach Bike Lock To Bike?
Slide the lock bracket onto the bike frame’s designated mount area. Secure it tightly using included screws or shims. Attach the lock to the bracket, ensuring it fits snugly. Tighten all parts firmly to prevent movement. Store the key or combination safely for easy access.
Is It Illegal To Put A Bike Lock On Someone Else’s Bike?
Yes, locking someone else’s bike without permission can be illegal. It may be considered theft or vandalism. It restricts the owner’s access and can cause confusion or fear. Always use your own lock on your bike only.
Conclusion
Installing a bike lock keeps your bike safe and secure. Follow the steps carefully for best results. Set your combination before mounting the lock or bracket. Attach the bracket firmly to your bike frame. Tighten all screws to prevent movement or theft.
Check the lock’s function before riding. Regular maintenance helps the lock work smoothly. Protect your bike with proper installation every time. Simple steps make your bike more secure and give peace of mind.